| « Military Strategy and Balloons | Who is George Santos (R-NY)? » |
Honda HVAC Mode Door Actuators
A little history first. I worked on cars for about 10 years before I went into a completely different industry. During that time I acquired all of my ASE certifications, except for Automatic Transmission. I missed the automatic transmission test by one question. 🤣 No matter, at the time I worked for Toyota, and we didn’t rebuild transmissions, we replaced them with Toyota remanufactured units, so I wasn’t worried about internal bearing clearances, I didn’t deal with that. If I needed to rebuild an automatic transmission I would refer to the manufacturer’s manual, as there are always updates to process over time anyway.
Back to actuators. In January of last year I did a post on how to repair a Honda Blend Door Actuator. This time I'm going to cover the Mode Door Actuator (the one that controls vent direction).
These actuators generally fail for the same reason the other kind do, the grease dries out and becomes stops the position feedback connections from making. The main difference is that the blend door actuators use a variable voltage feedback for position awareness. The mode door actuator uses switch contacts for position awareness.
This particular actuator is from a 2008 CR-V. The actuator is located on the passenger side to the left of the glovebox. Remove the glovebox door, the kick panel under the glovebox, and passenger side foot vent. The actuator should now be accessible.
Now I'll get into disassembling the actuator and repairing it.
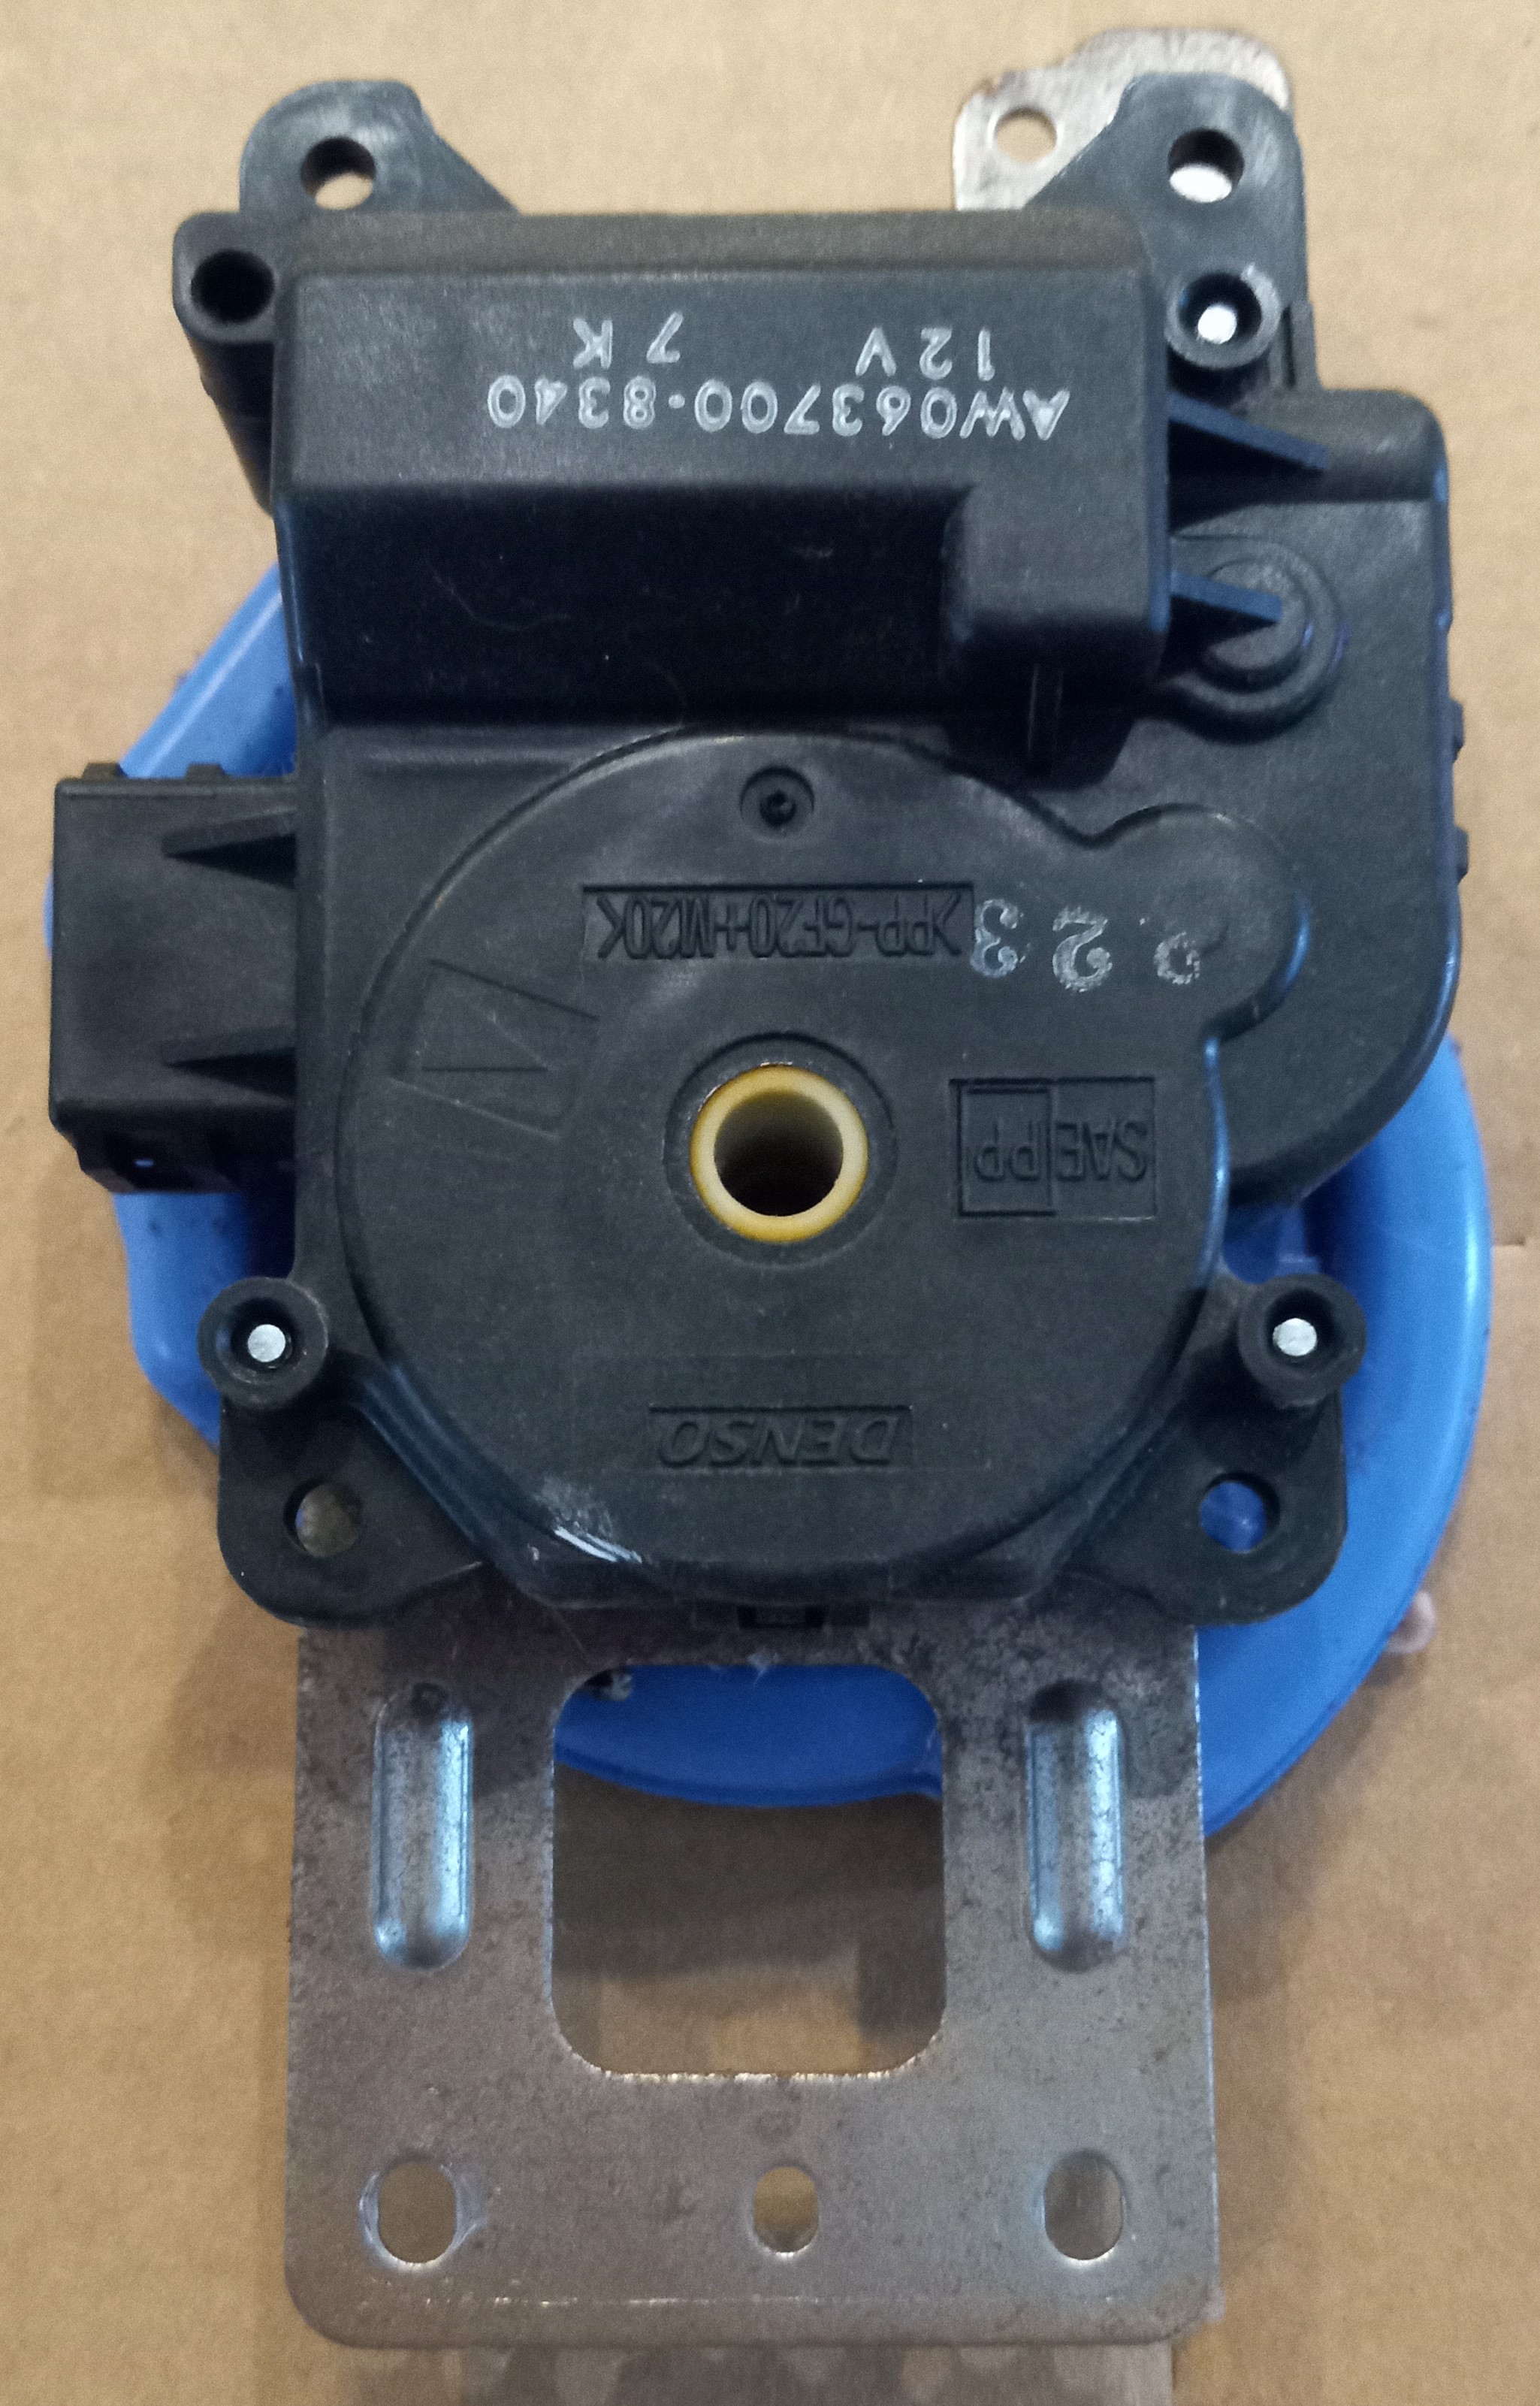
This is a view of the assembly as it looks mounted in the car. The metal bracket is between the actuator and the HVAC box.
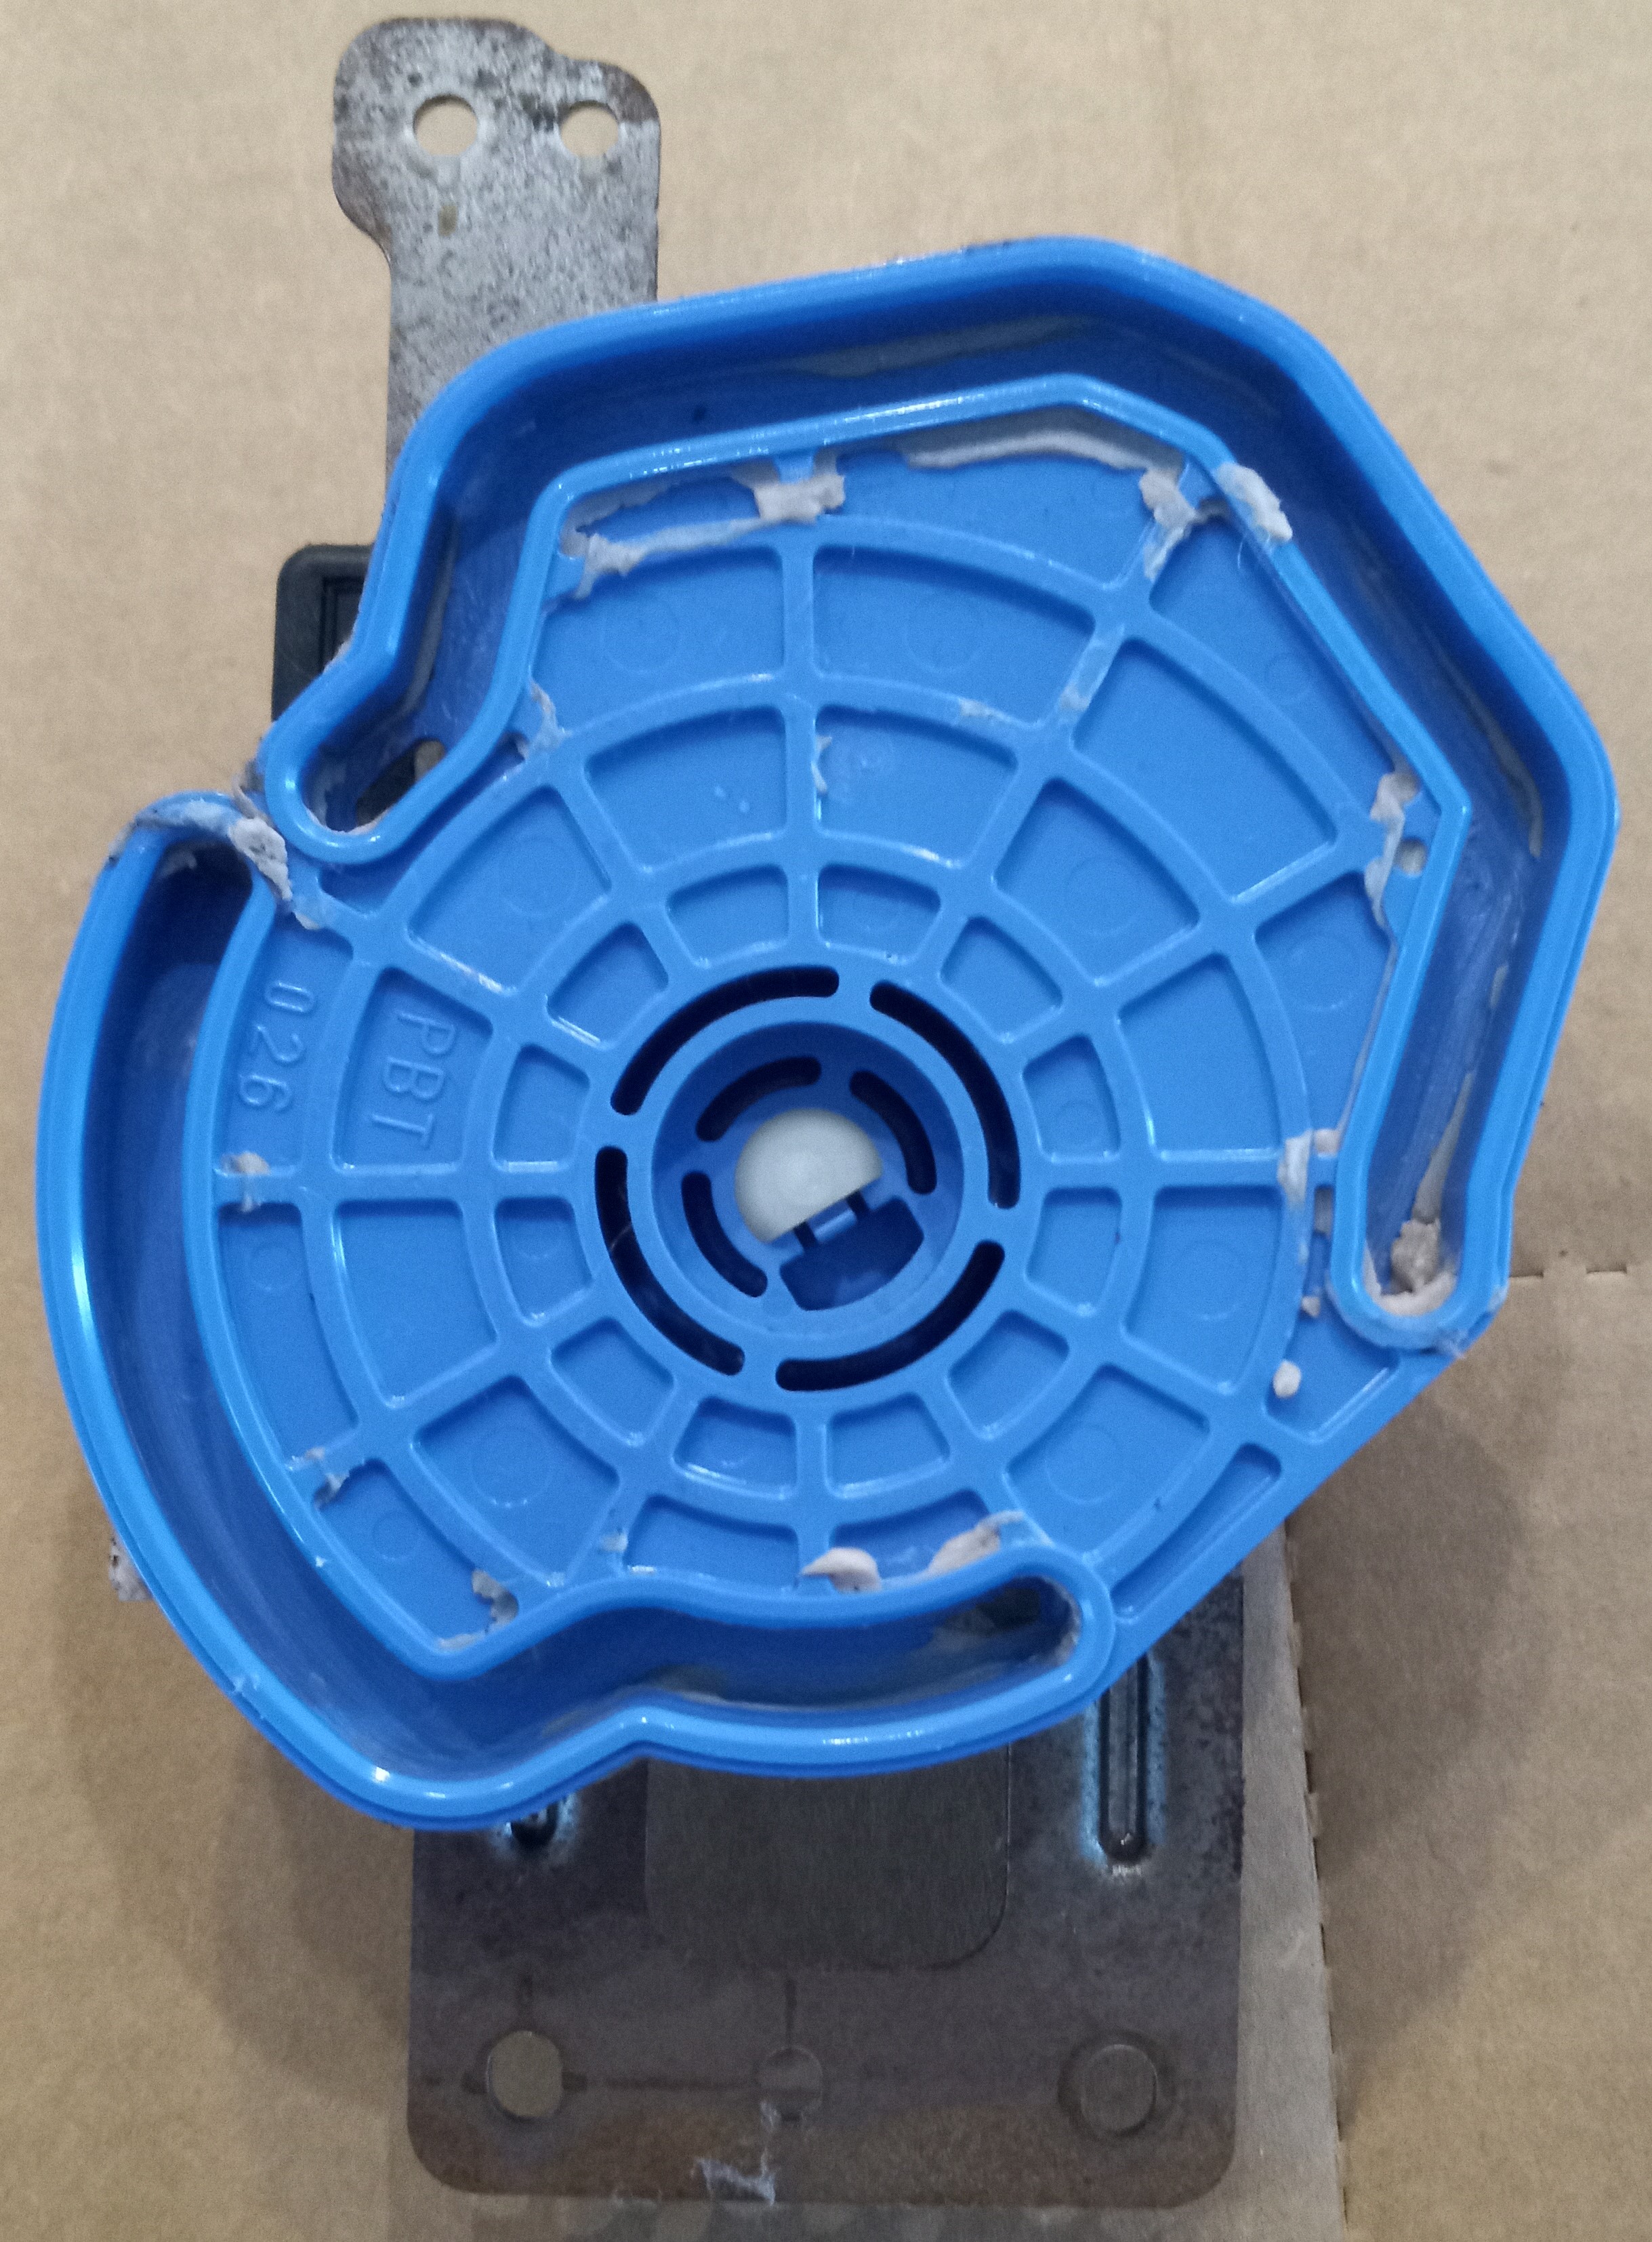
This is a view of the output slide mechanism. This is where the door levers are manipulated.
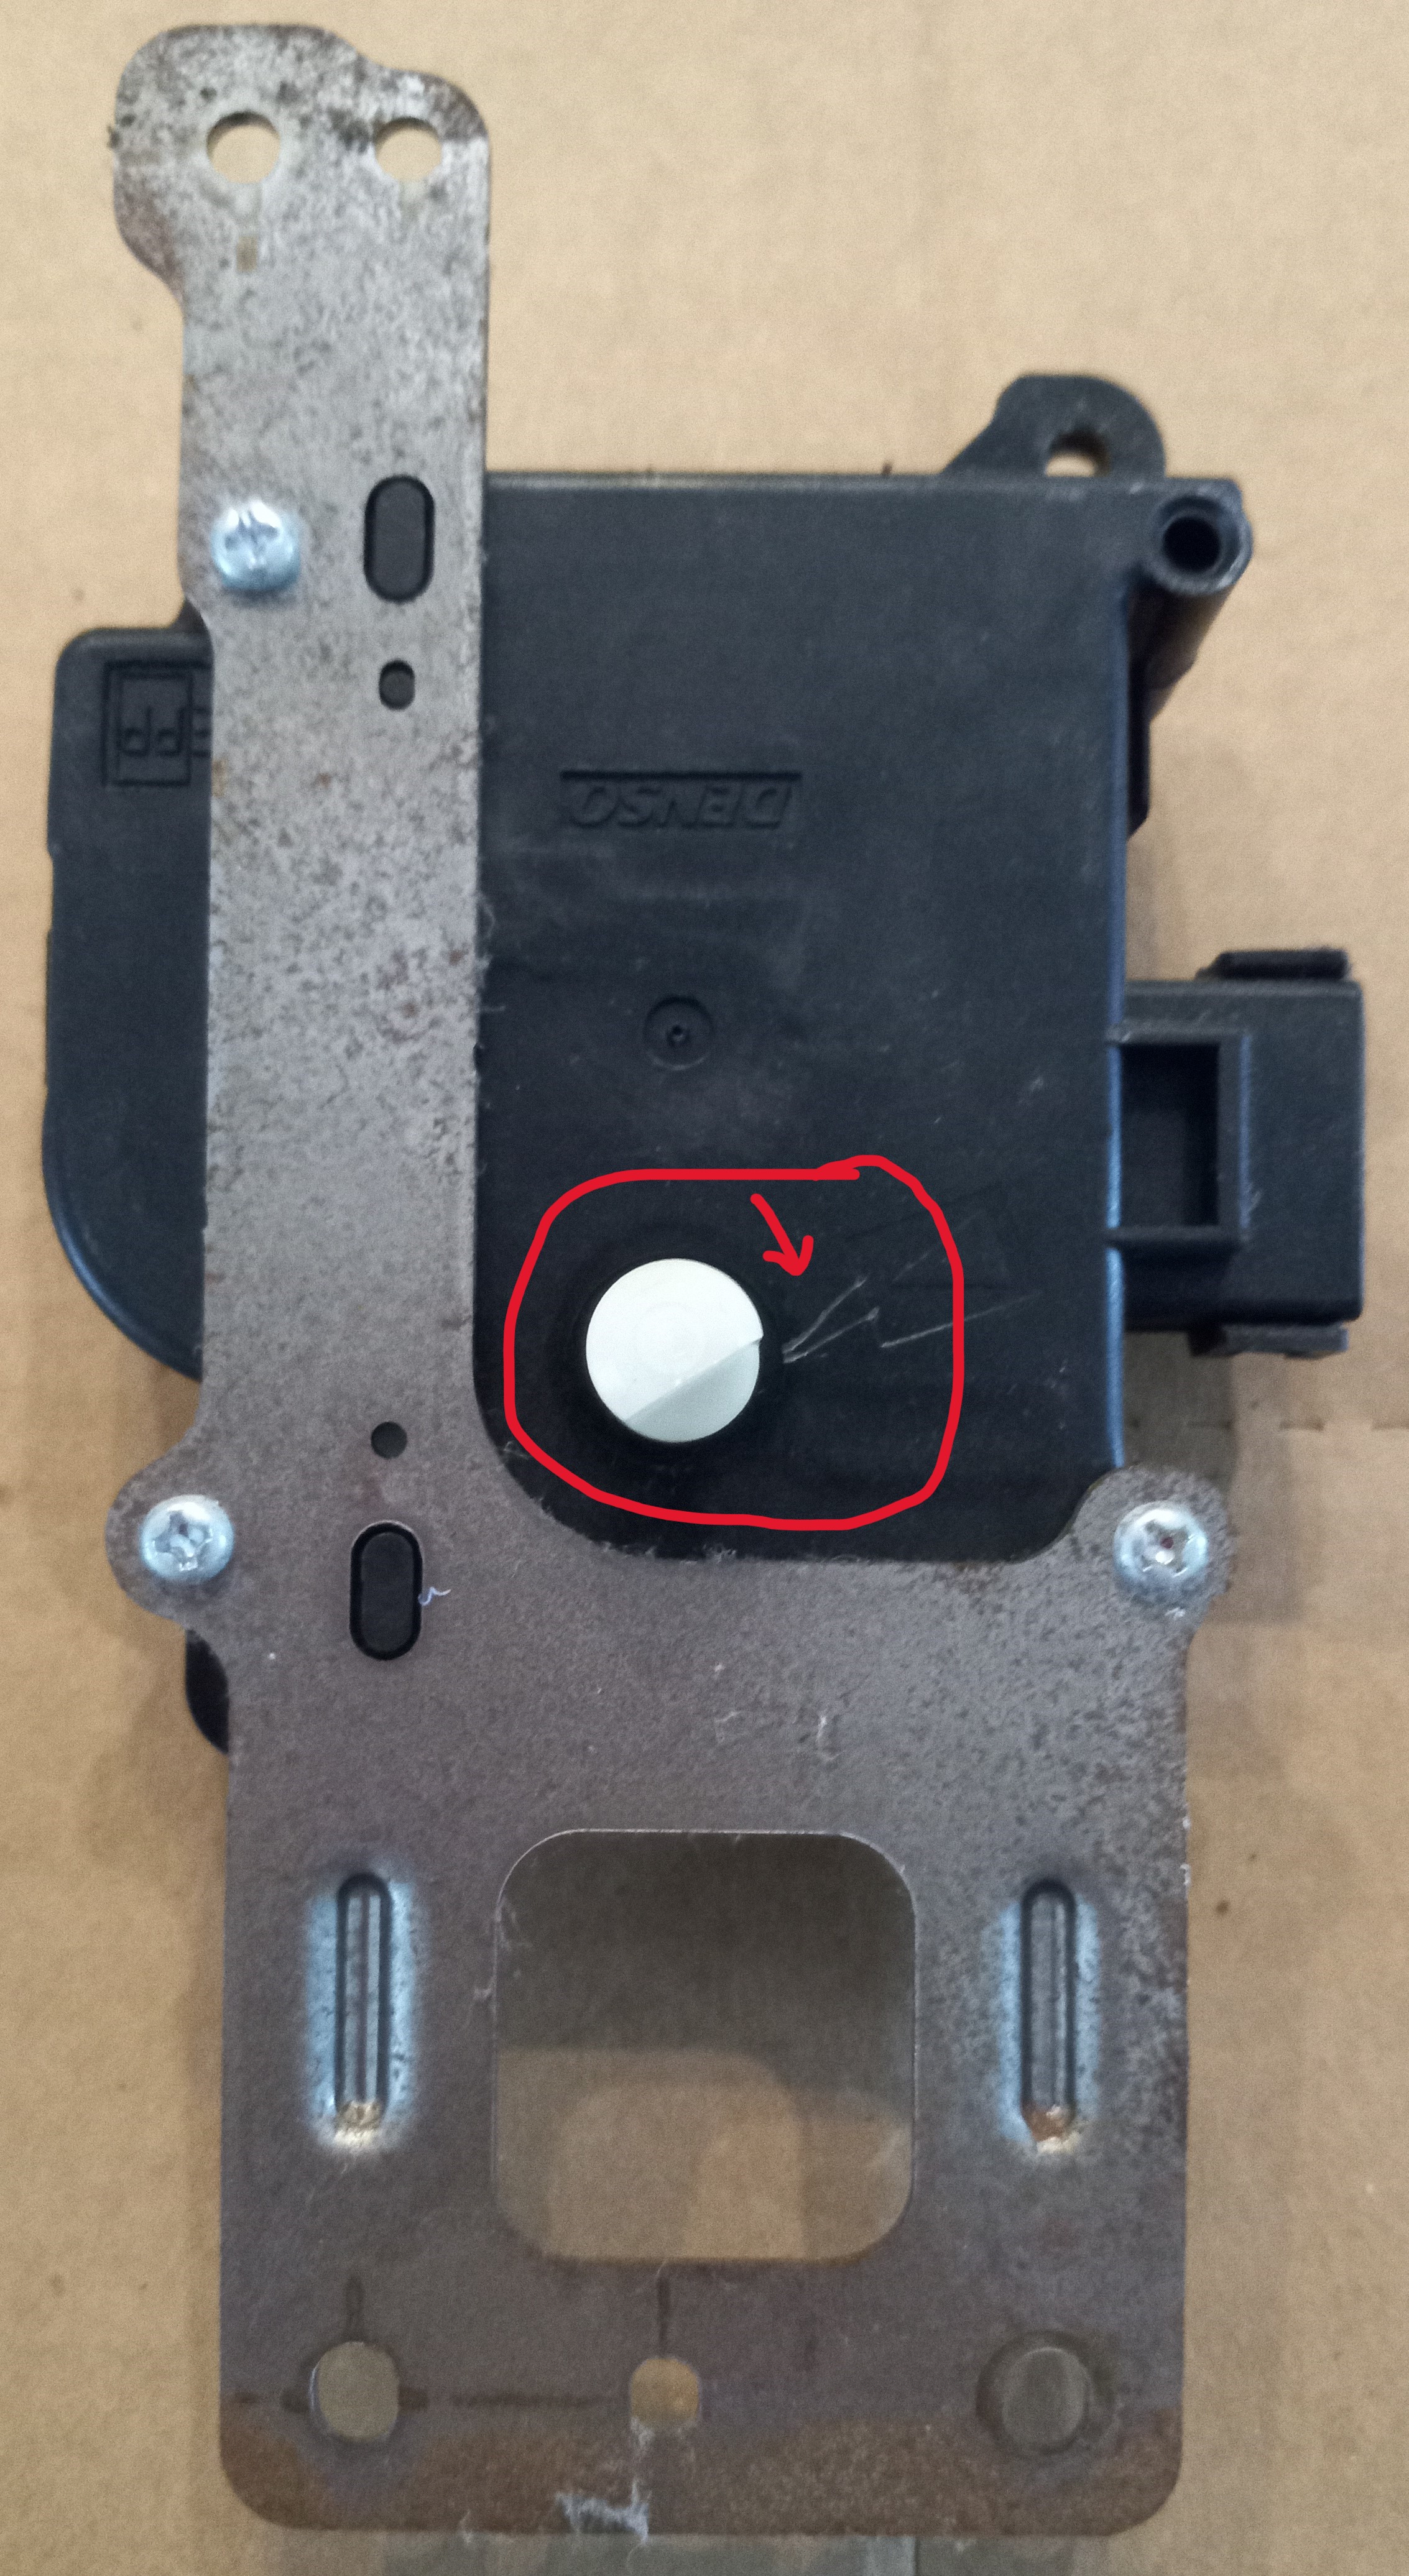
Even before removing the bracket, I want to mark the output shaft, so that I know where it lines up. If it's clocked wrong, the actuator won't work correctly. You can see where I made a mark by scratching the plastic with a screwdriver.
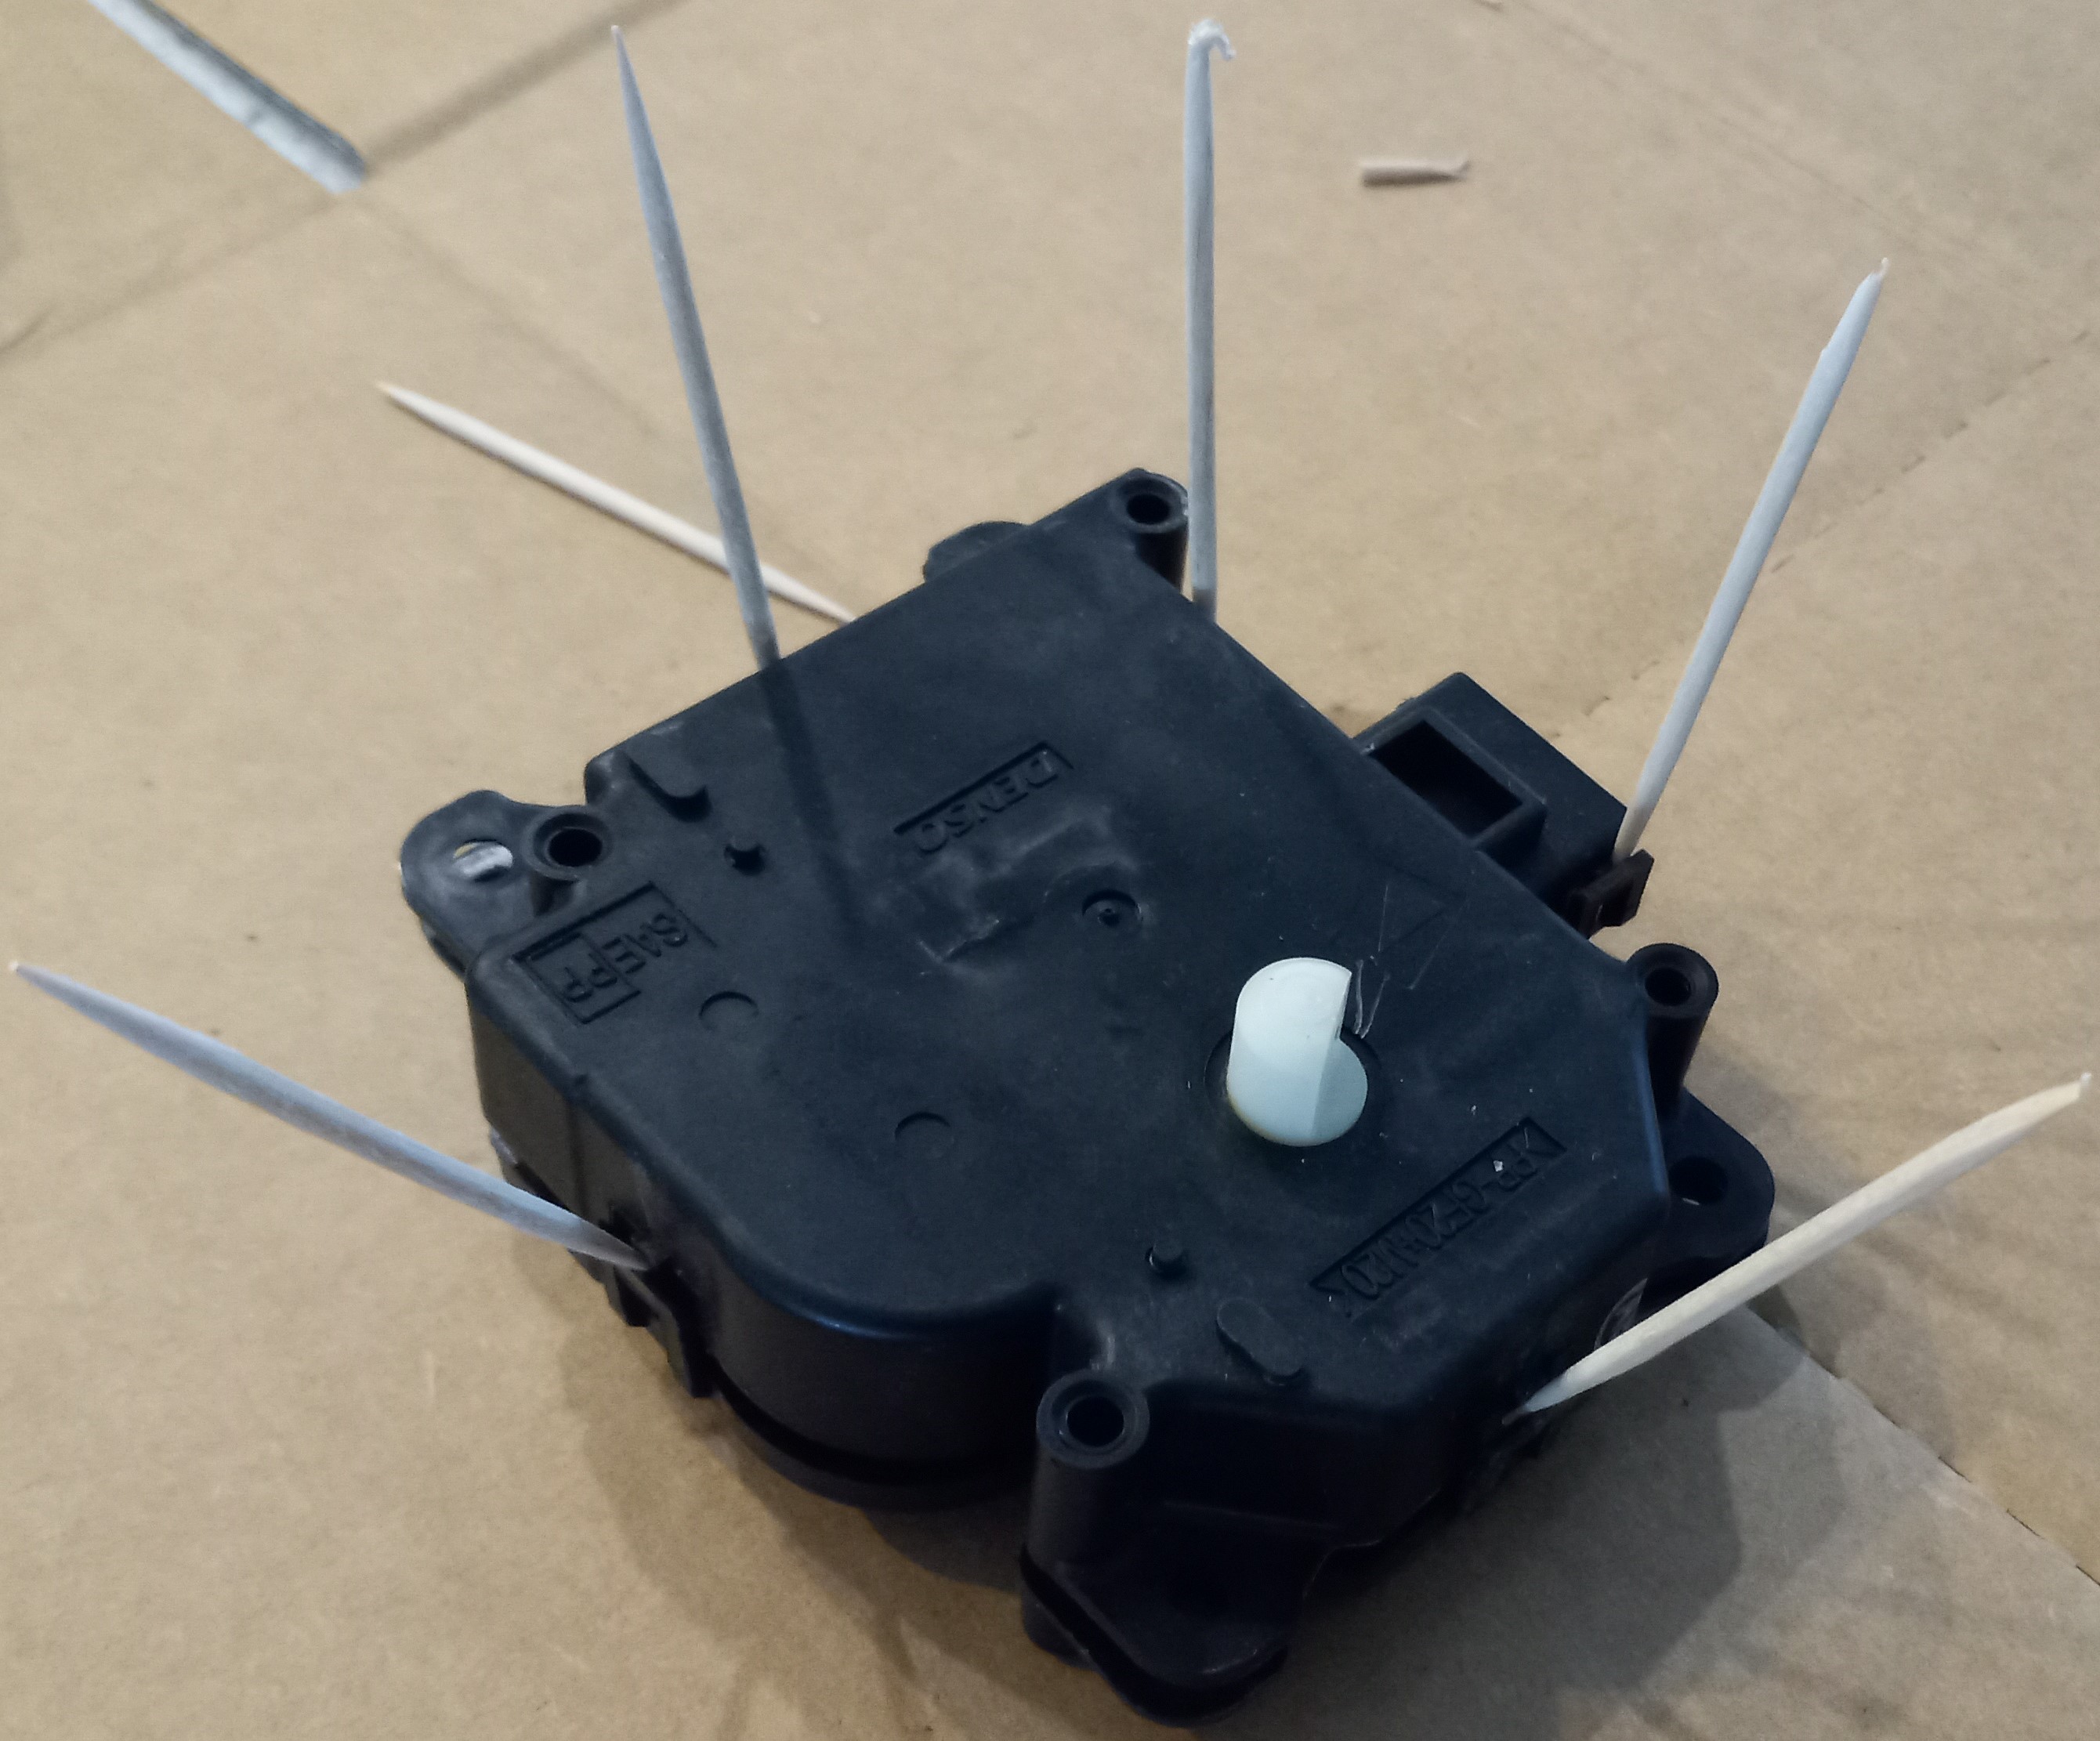
Once the bracket is removed, you have to unsnap the clips that hold the actuator housing together. They go all the way around.

In order to get all of the clips at once, I use toothpicks. I can pry the plastic just enough to get a toothpick in, then move to the next clip. Note: The clips by where plug goes almost always break off.
Once you have the actuator assembly open, mark the motor's position. The motor can go in either way, but it is a DC motor, so it's polarized. If you put the motor in the wrong way, the actuator will turn in the wrong direction relative to command. It won't hurt anything, but it won't work either.
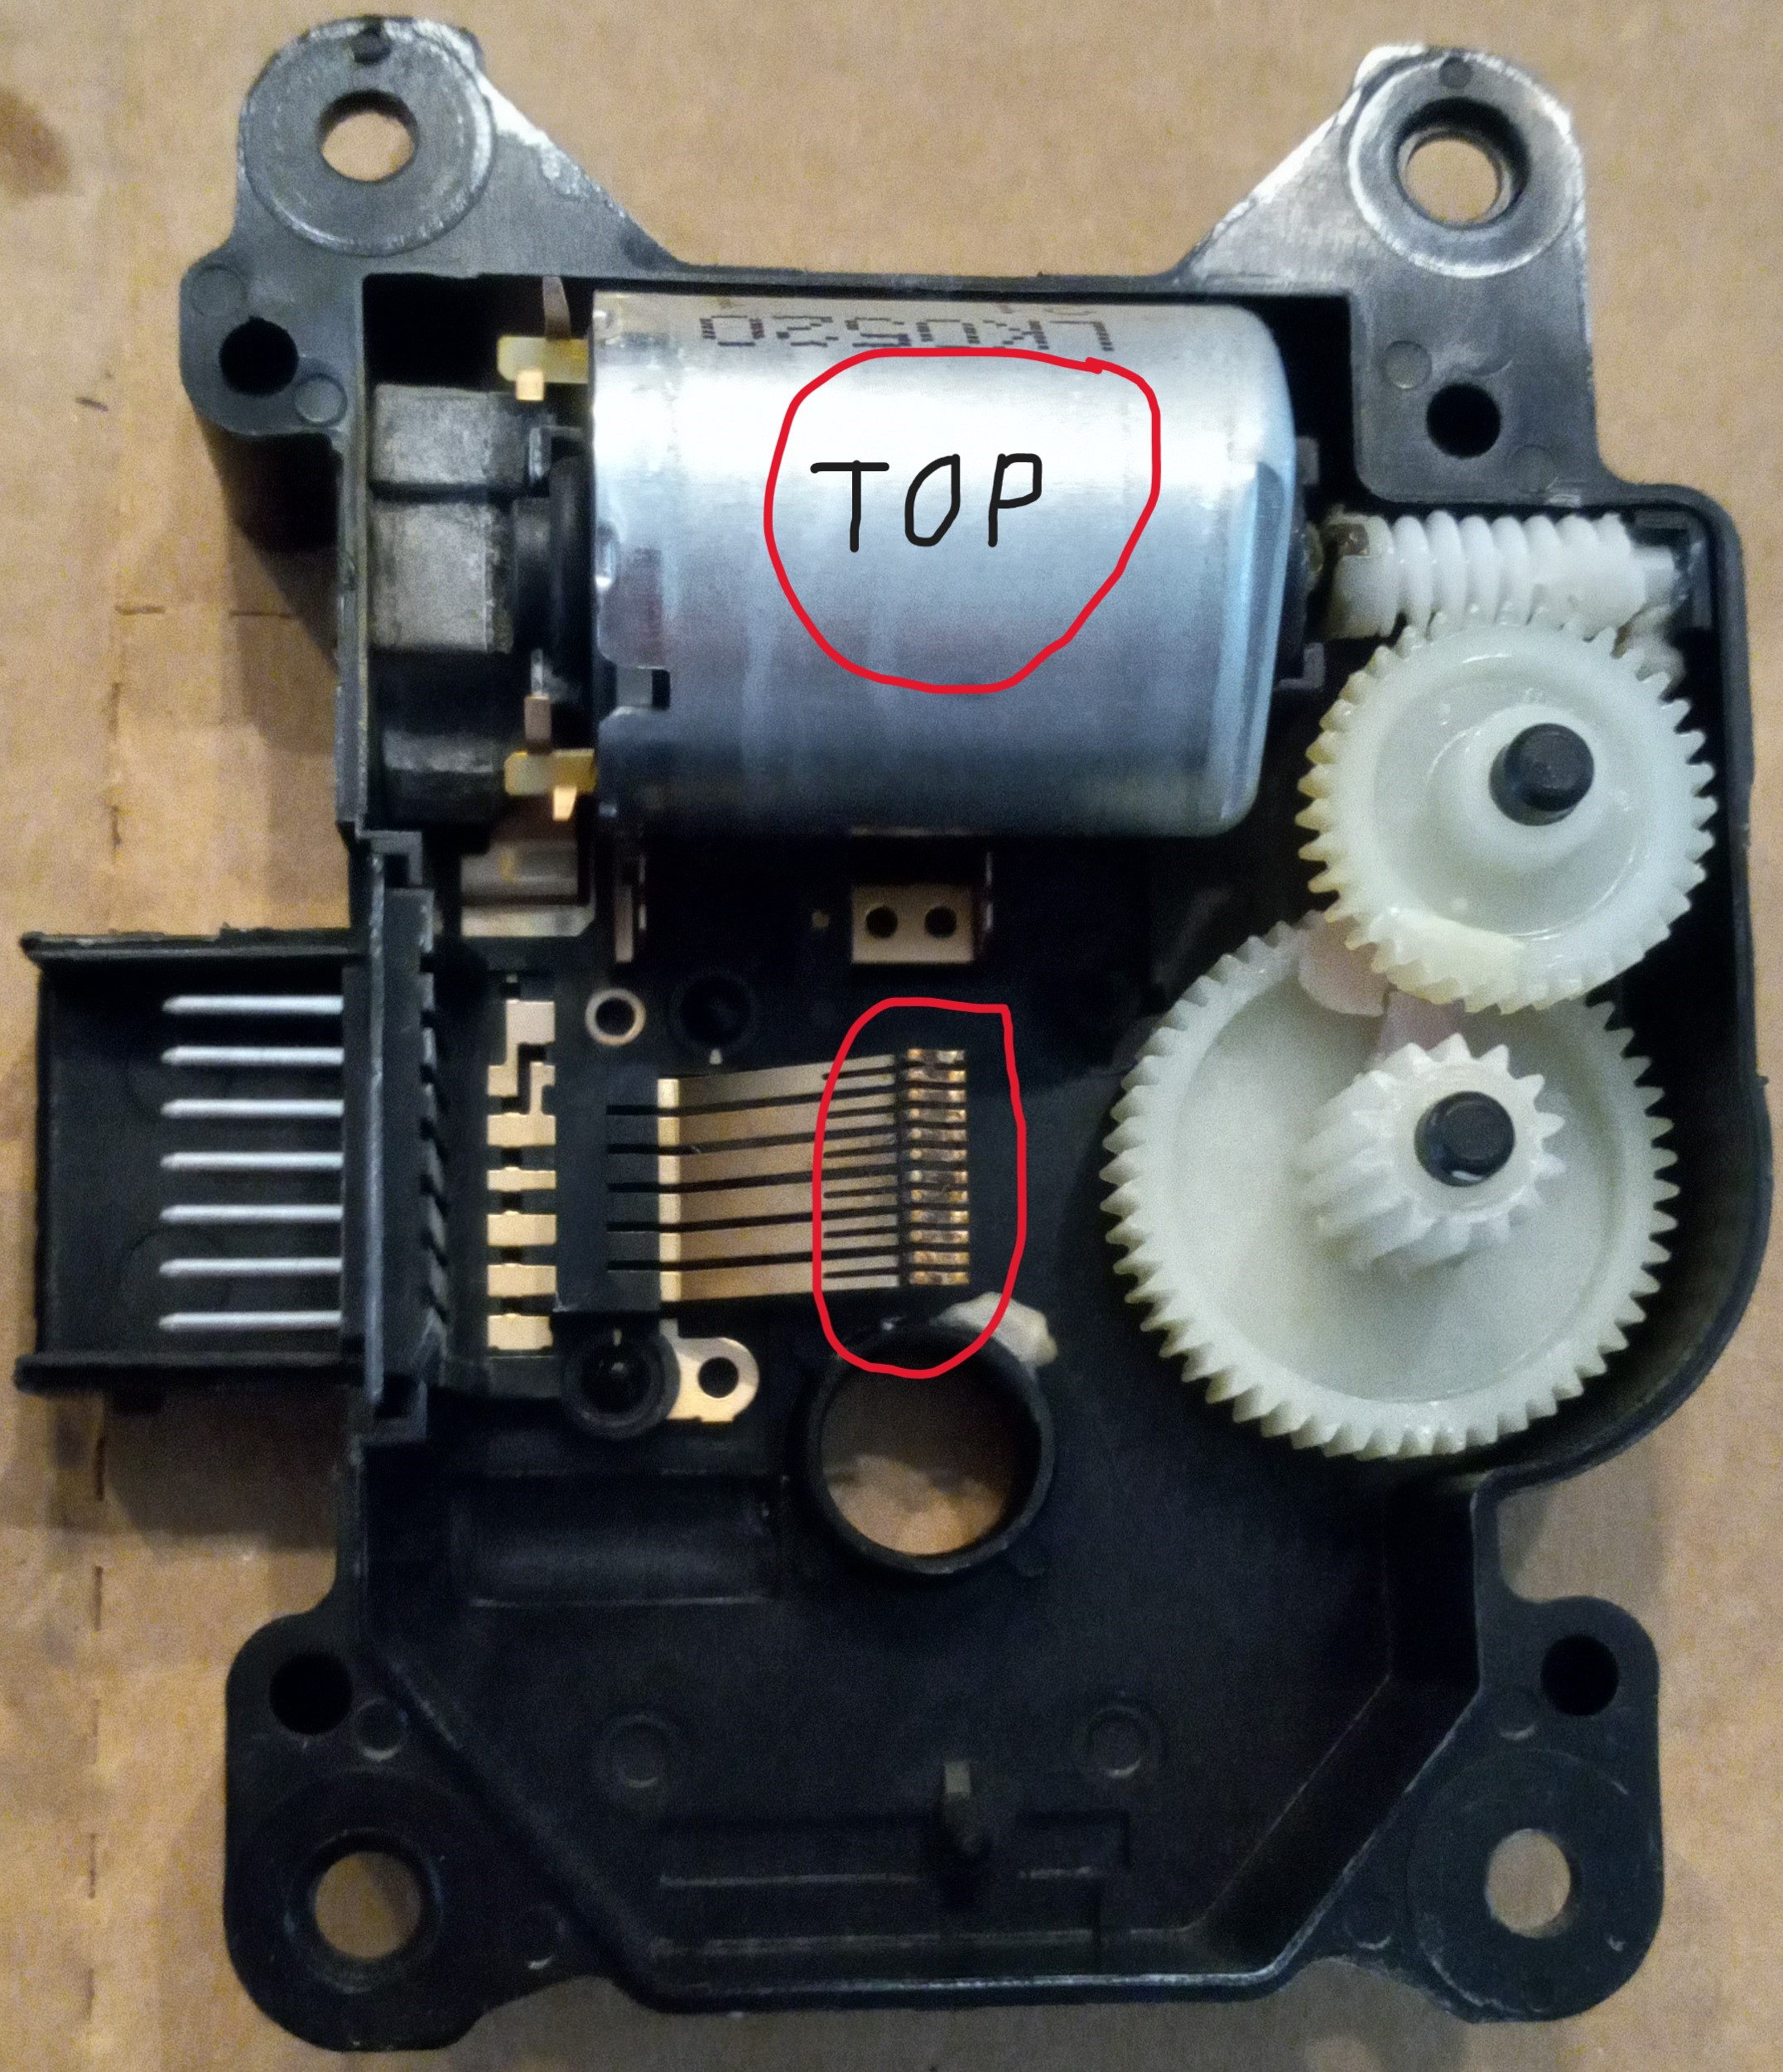
From this picture you can see the output gear. You can also see the switch contacts used to determine the position of the actuator. The old grease is thick and stopping good connection between the little copper wipers, and the positioning contacts. This is the most common issue with these actuators. Clean all of the grease off of the positioning contacts and cover with a thin coat of Vaseline.

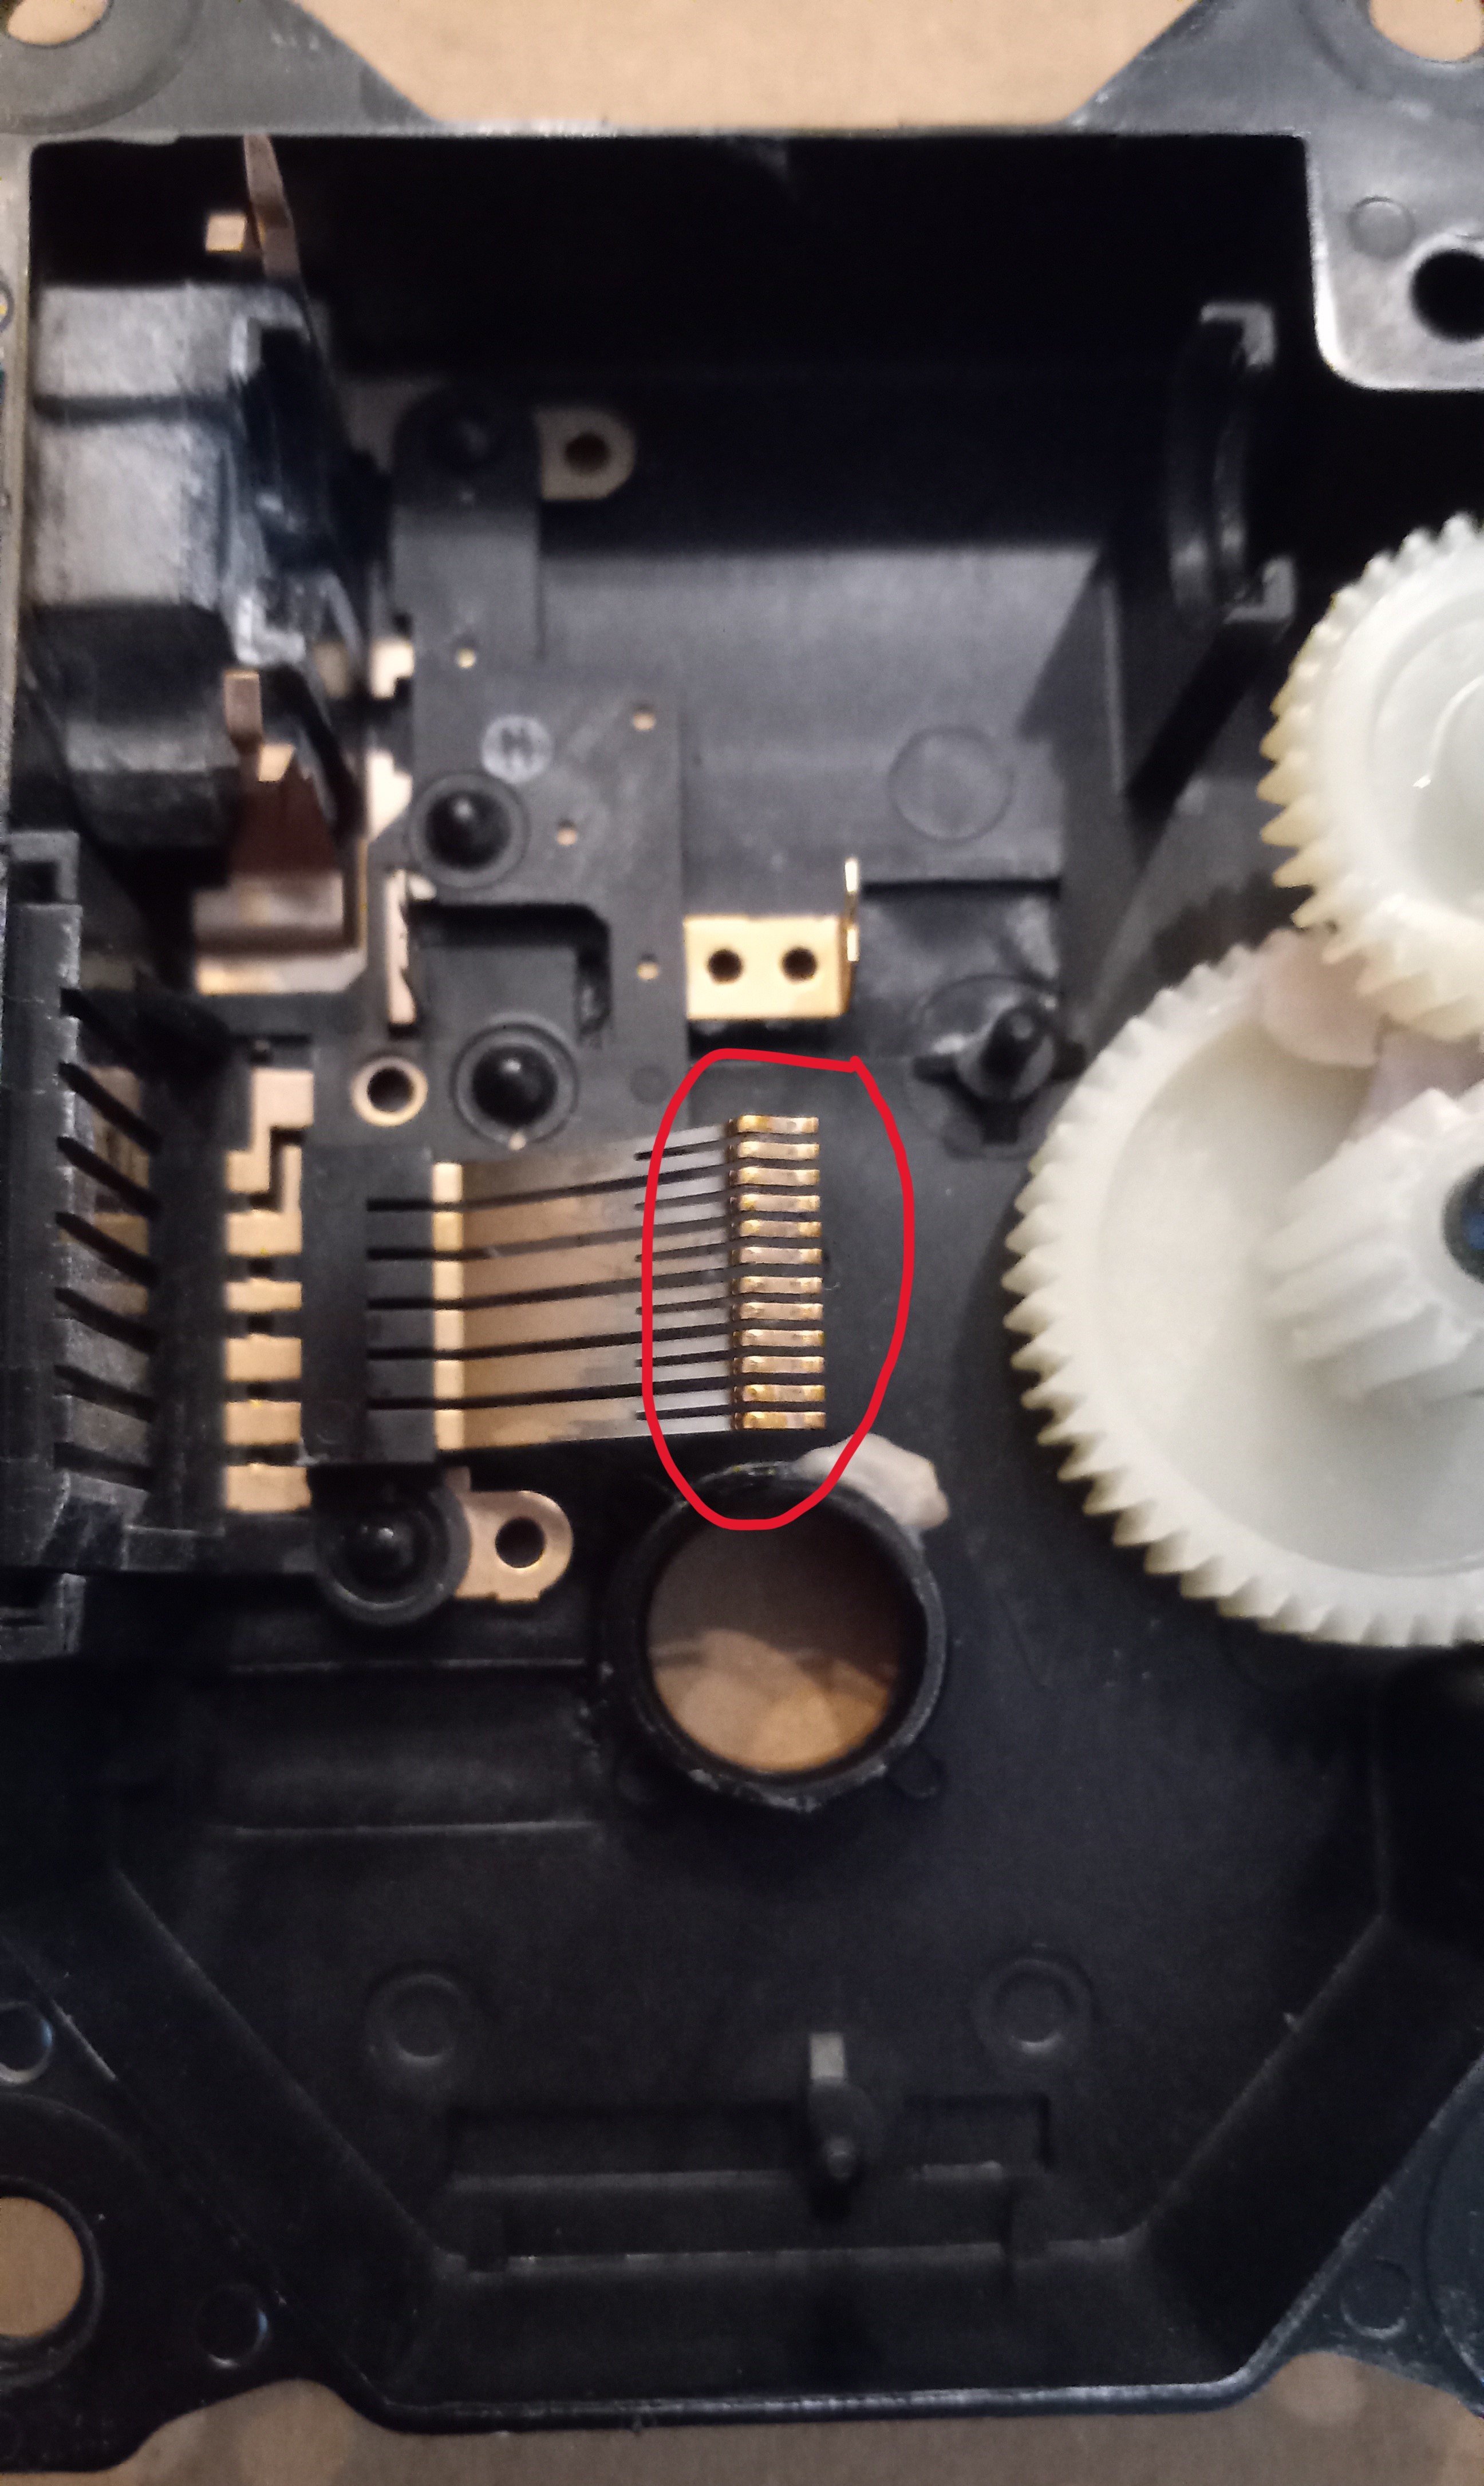
Here you can see the little copper wipers. I also clean these off, and bend them up a little more to assure that they have good contact with the positioning contacts. Just place your finger on the plastic that secures them, and bend them up a little by hand, making sure not to bend them laterally.
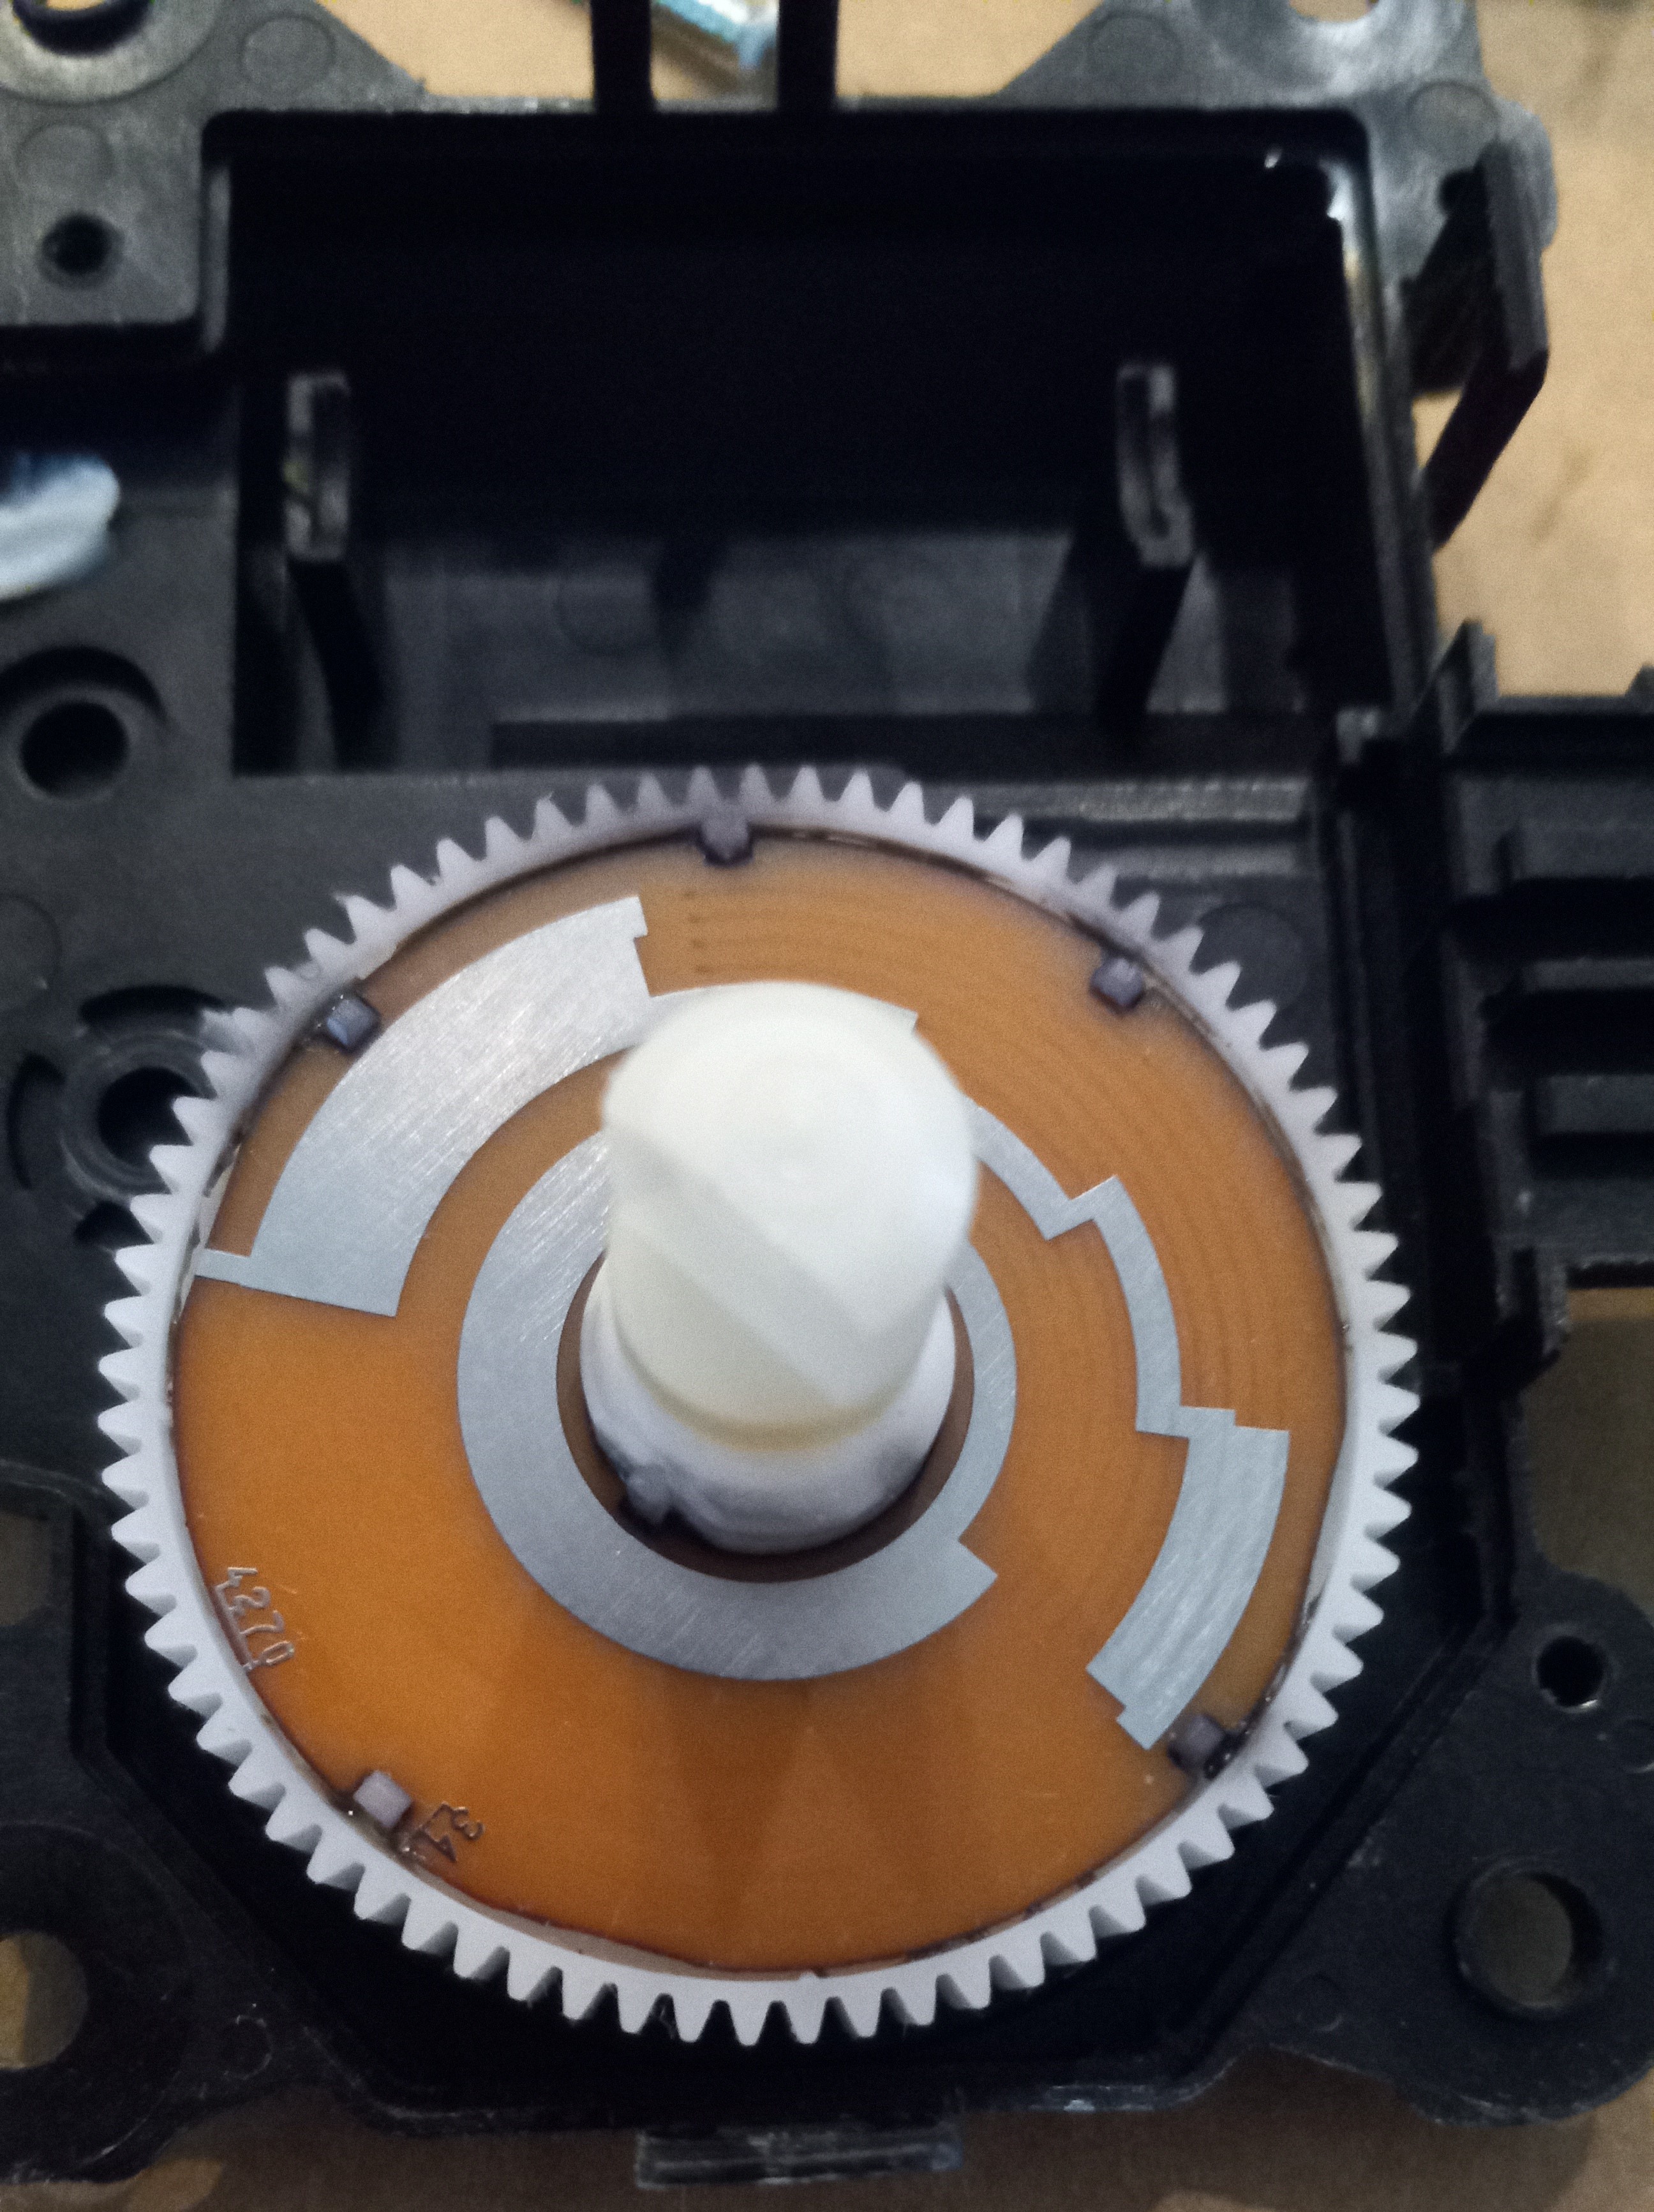
Here you can see the positioning contacts cleaned off and some Vaseline applied.
This is a closeup view of the copper wipers.
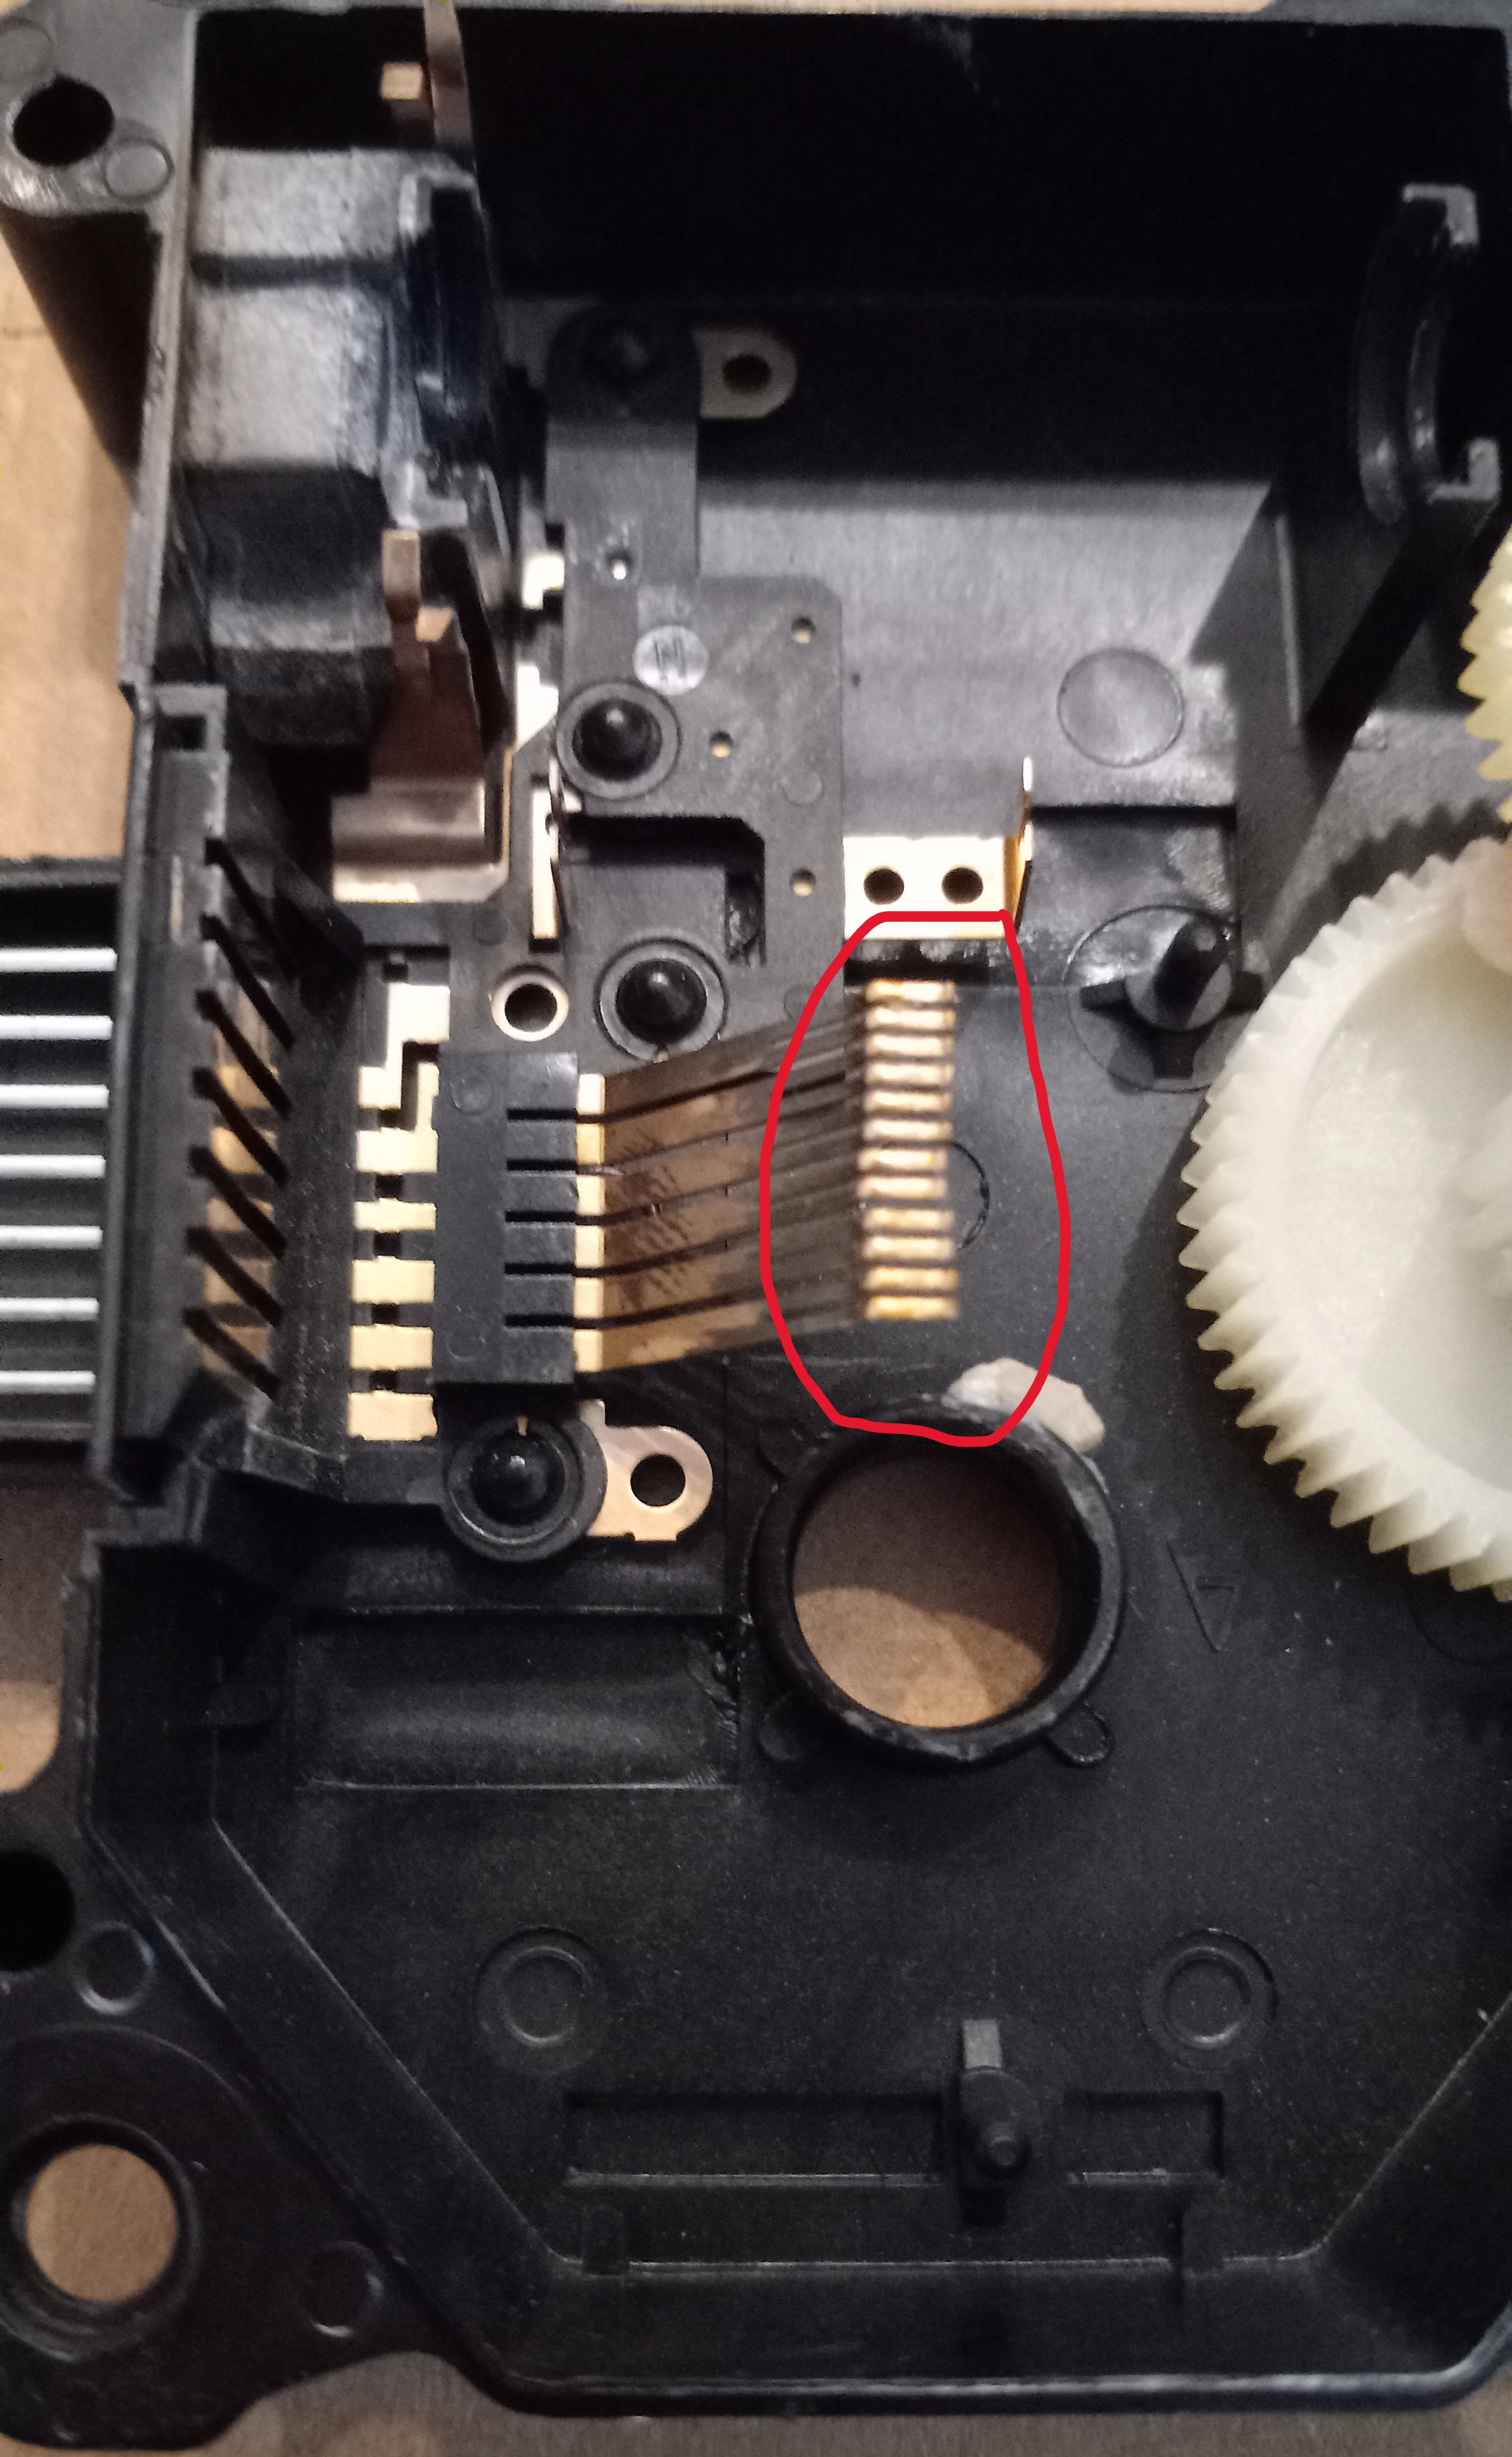
This is a view after I bent them up a little bit.

You can now reassemble the actuator making sure that the motor is in correctly, and the output shaft markings line up with where you had them. The actuator should work correctly again.
Note: You DO NOT need to register to leave a comment. Email addresses are NOT used. Just make one up "someone@somehost.com"
The QR code below links to WindUpRubberFinger.com for easy sharing.