| « Vaccine Excipient Summary Where Art Thou | CrowdStrike Strikes First » |
Automatic Toilet Bowl Chlorinator, Not Flush 'n Sparkle ®
When it comes to toilets, nobody likes cleaning them, or at least they shouldn't.
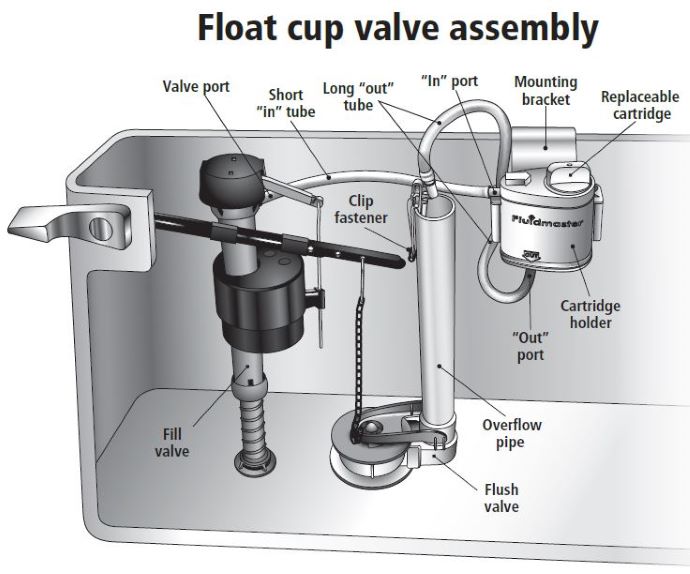
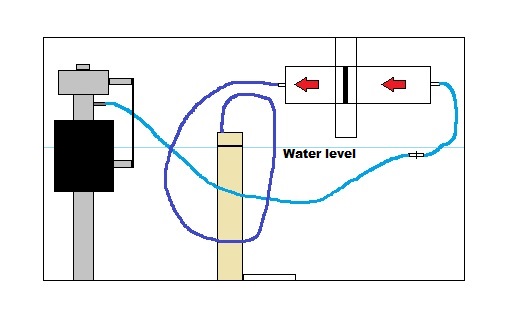
Many years ago I saw a product in the hardware store that caught my eye. It was called Flush 'n Sparkle, made by FluidMaster. It's a device for putting chlorine directly into the toilet bowl through the tank overflow pipe, which drains directly into the bowl. Here's a diagram below.
I bought two of them probably 15 years ago, but they stayed in the house we were renting. I bought them again once we purchased the house we're living in now. I used them for a number of years, but the enclosures became degraded because of the chlorine. The refill cartridges are rather expensive at $8 - $15 for a two pack. Of course they claim that you might need to replace them every 3-months, but that's not the case in my house. With (4) of us using the bathrooms throughout the day, 3-months was not realistic, they were gone long before that.
I decided to make the cartridges refillable. So I took my pocket knife and pried on the bottom of the cartridge until I was able to get it open. Then I went around the bottom part and shaved off the lip, so I could open it easier the next time.
The cartridges come with two tablets that are a around 3/4 of an inch in diameter. I went to the hardware store, and found chlorine tablets that were 3/4" and popped them in.
I woke up, went to use the bathroom, and was almost knocked down by the smell of chlorine gas. I told my wife, "I have to get those chlorine tablets out, before we all die from chlorine gas inhalation. We'll all be dead, but we'll have the cleanest toilets in town!"
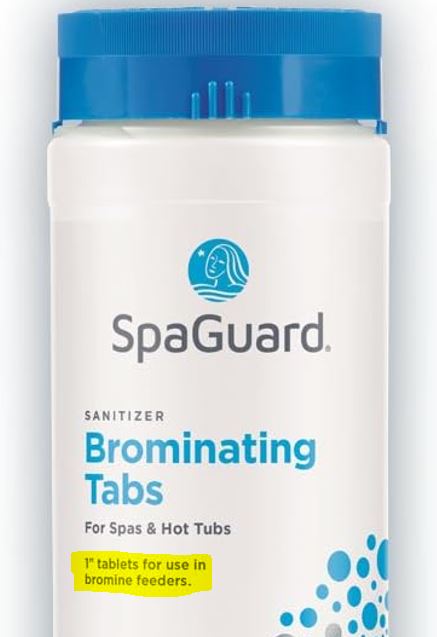
I thought that the FluidMaster cartridges had chlorine tablets in them -- only they're not chlorine tablets -- they're really brominating tablets. They're what you would use in a hot tub. They dissolve much more slowly than chlorine tablets, and give off much less odor. That's why they used them.
I was only able to buy the brominating tablets in a 1-inch size. A large container of brominating tablets was around $15 at the hardware store. That would literally last me a few years!
I used a hammer and a screwdriver to break them in half, then they would fit in the cartridge. I could pop in the brominating tablet pieces, reinstall the cartridges and be good for another few months. Problem solved. Or so I thought. After a few years, O-ring at the top of the cartridge would rot, and require replacement, but in order to make sure that it would last, I would have to use Viton O-rings. I could get those rather cheap, but then the housing started to degrade as well.
I figured no worries, I'll head up to the hardware store and buy a few new kits, and be on my way. But they don't carry them anymore. They still have the refill cartridges, but none of the kits.
Next it was off to Amazon to see what they had. They also don't have any of the kits available!
Time to make my own
No worries, I'll make my own, only I'll do it without any O-rings! Well, I did, and so far, so good. Here's my design.
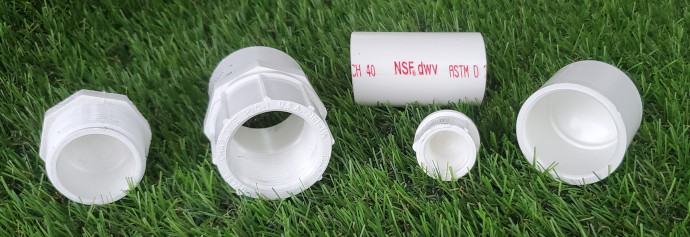
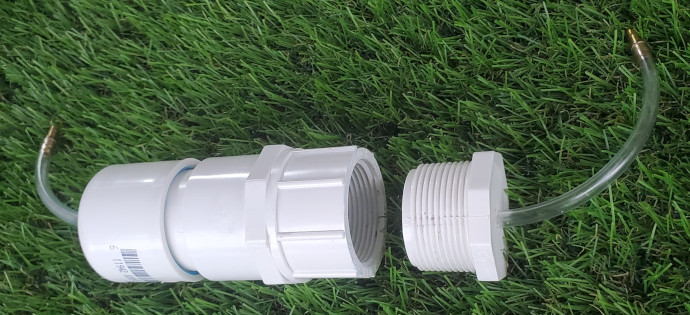
First I looked at PVC pipe sizes and determined the smallest diameter I could use, which would still fit the 1-inch tablets. That was 1 1/4" Schedule 40 PVC pipe, I only needed a piece about 3-inches long, so I bought a scrap piece from the hardware store. Here's what I came up with.
I needed to make it so that water could flow from one side to the other, passing over the brominating tablets along the way. Using 1 1/4" PVC meant that adapting down to a size that would work with standard toilet tubing (around 5/16") would be an issue.
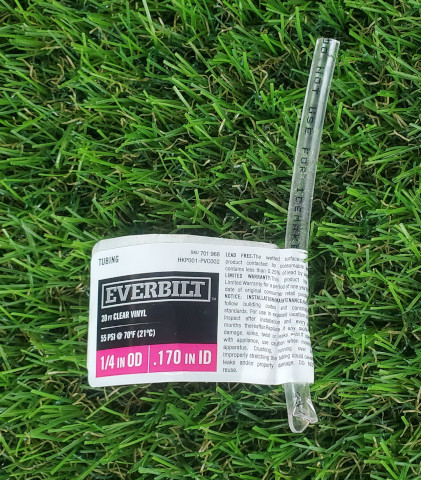
But then, I thought about how weed eaters/string trimmers have fuel lines that just pass through the tank. The tubing is slightly squeezed by the tank, forming a "good enough" seal. I figured that it might work for this as well.
I used 1/4" tubing because it seems to be the right size for most newer toilets. Normally the tubing is around 5/16" which causes a lot of water waste. They started selling adjustable fill valves for toilets, and tubing clamps, because the old valves would dump a lot of water down the drain -- instead of filling the toilet tank. using a 1/4" tube allows for plenty of water to fill the bowl, without wasting a bunch of water.
I drilled a hole slightly smaller than 1/4" in the outlet cap. I went very slow to make sure that it didn't heat up the PVC, and didn't leave a scored edge wall, to make a smooth sealing edge for my tubing. Using a deburring tool, I cleaned the edges where I drilled, but was careful only to deburr, and leave a very slight beveled edge.
I pushed the tubing through the end cap. Then cut a small plastic barbed coupling in half each half. Putting one piece in the tubing on the side under the cap. This would allow for the tubing to be secure, and not get pulled or pushed out.
Originally I wanted to make it without glued parts, but I found out quickly that it wouldn't work well. I was able to push the ends on by hand and pull a vacuum on the assembly and it would hold. However, when I put it in the tank, it would leak a little from one side where the cap was pushed on. Also, if you pushed them on too tightly, you couldn't get them off without plier. So, I decided to glue one end on, and make the other end with a screw on cap instead.
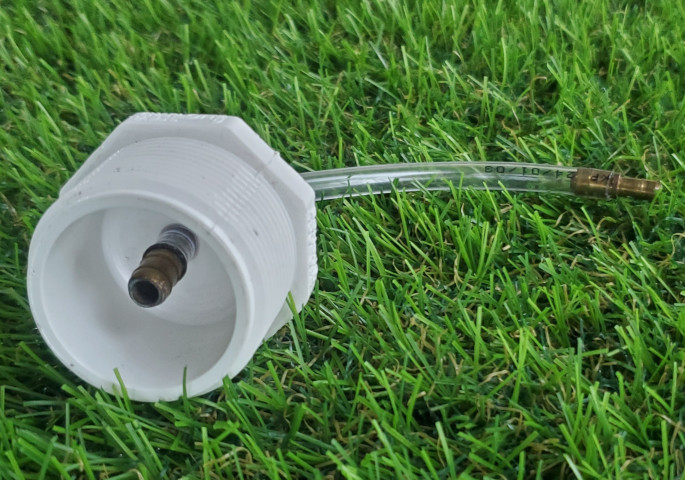
I drilled a hole in the screw-on end, like I did for the outlet cap, then pushed the tubing through the hole, then installed a barb fitting in each end. This is the inlet side, so there needs to be a place to couple it to the existing toilet tubing.
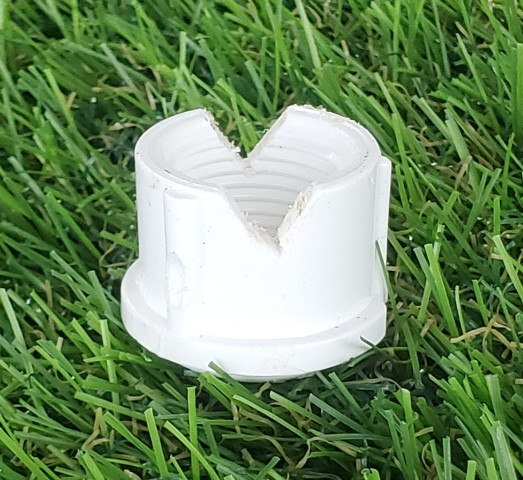
I needed something to make sure that the brominating tablets didn't go all the way to the end of the assembly, and plug the outlet hole, so I decided to use a smaller 3/4" PVC threaded endcap and cut V grooves into it so the water could get around.
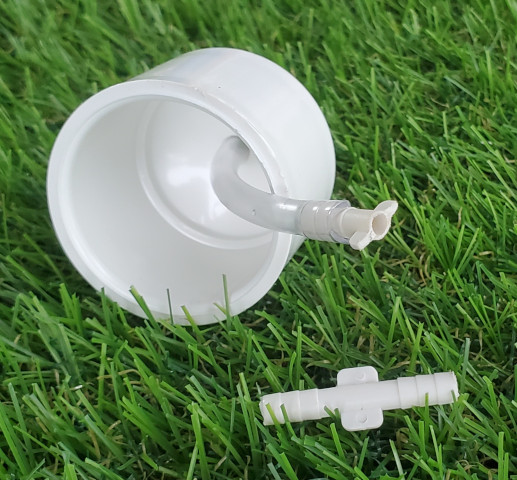
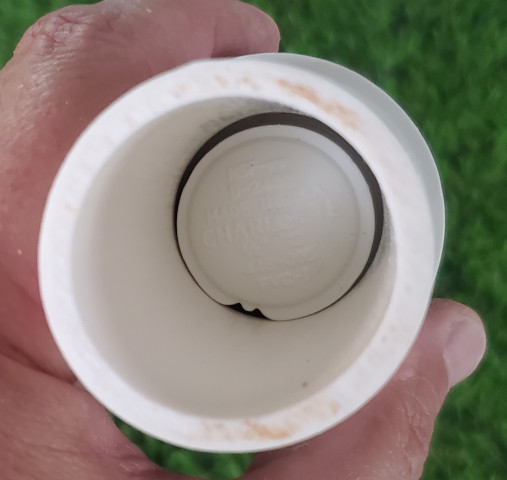
Here's how it fits into the assembly. This is the outlet cap, with the tubing and barbed fitting at the end of the pipe.
Water can get around the cap, but it will stop the tablets from butting up against the outlet tube.
I glued the outlet cap onto the 1 1/4" pipe, and glued the threaded fitting to the other side, making sure not to get PVC glue on the threaded part.

Here's what you end up with.
Note: I did use Teflon tape on the threads because with the PVC threaded parts are often poorly made. Use a lot, because it needs to be sealed well enough, but also be where you can open it again by hand.
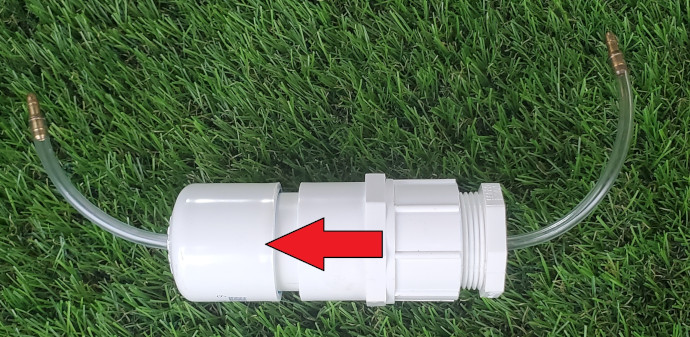
This shows the direction of water flow.
In order to suspend the assembly above the water line, I used a plastic door hook, like this. You can find these on Amazon for about $8.
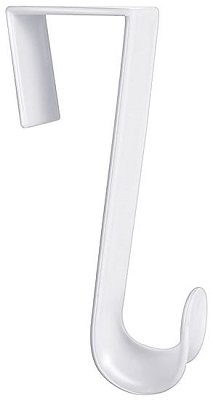
I just drilled two holes in it so I could put a zip-tie around the assembly, then hand it from the side of the toilet tank. Here's what it looks like installed.
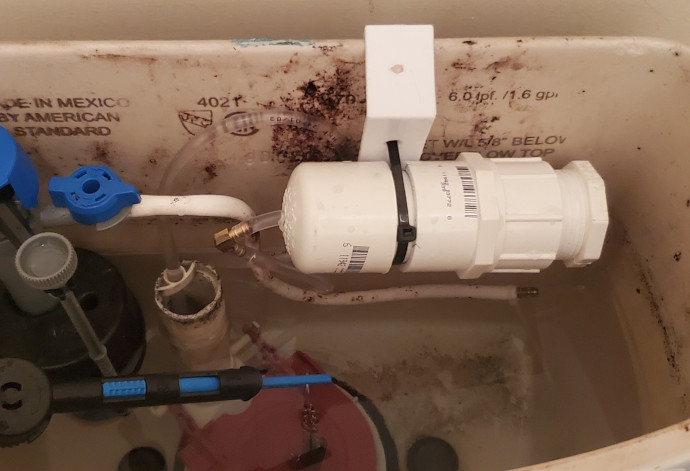
If you notice in the picture, I used a 90º elbow at the outlet side. That's before I knew that I needed to have the outlet tubing go below the water line. If you look at the first image, the FluidMaster diagram, you can see that their device is made to force the outlet tube below the waterline.
I could have made it with only one coupling to connect to the inlet, and used the vinyl tubing the entire rest of the way as shown below. Just make it around 2-feet long, and make a big loop with it. making sure that it goes below the water line.
One last bit of information. Make sure that outlet tube goes into the overflow tube and stops right at the water line. If you go too low, it will siphon. If you go too high, it will draw air in to the outlet tube back to where it meets the water line. It won't hurt anything, but it might make a noise when water rushed through it.
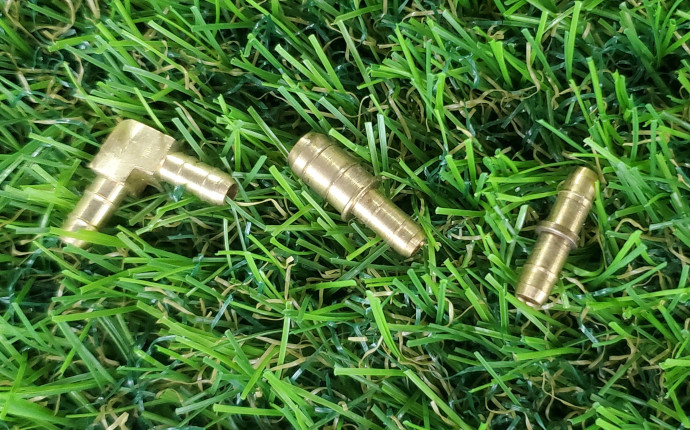
All of the parts I used you can find at an ACE Hardware, except for the brass barb fittings. I only have these because of a building controls retrofit I did many years ago. But you can use the plastic barb fittings they have at ACE. They have 3/16" barb fittings which will work for the 1/4" OD vinyl tubing.
Did I save any money with this? Probably not, but that wasn't really my goal. I just wanted to have my automatic toilet bowl cleaners back!
I hope you liked this project.
Please leave a comment, like it or hate it... You DO NOT need to register to leave a comment. Email addresses are NOT used. Just make one up "someone@somehost.com"